
Introduction
This article provides an overview of the features you can use in Canvas for Palette printing and more.
-
-
Transform models for multi-material printing by painting them in Canvas. This is best with models that are single-body or comprised of one model.
-
Painting allows for colored regions to be created directly on the model.
-
Painting will not separate the model into multiple STLs, but the painted regions will be recognized as regions for color transitioning after slicing.
-
Stamping allows for images to be placed on the model. Check out these tips on how to get better stamps onto models.
-
Stamping behaves like an image on a light projector against an object. The stamp is best placed on flat faces of the model, and will "wrap" around the geometry. Multiple stamps can be used on a model.
-
Painting and stamping are available when you select an ungrouped model, and click Paint Selected.
-
-
-
Custom supports allows for support placement to be selected and placed manually, minimizing surface defects.
-
Adding custom supports is similar to painting, where regions and polygons on the model can be selected. Supports will generate directly below the painted region towards the bed.
-
Custom supports are available under Project Settings > Supports > Support Method: Custom > Configure Custom Supports
-
-
-
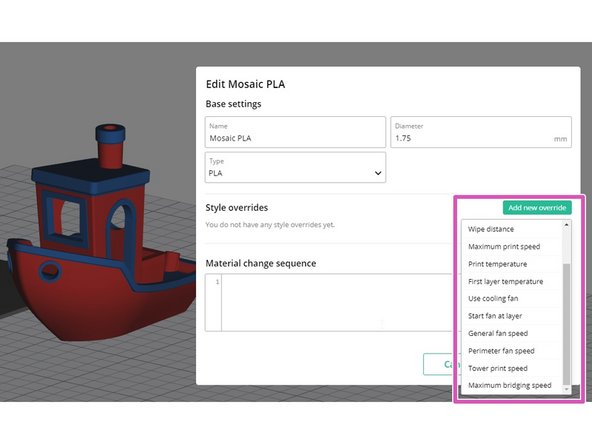
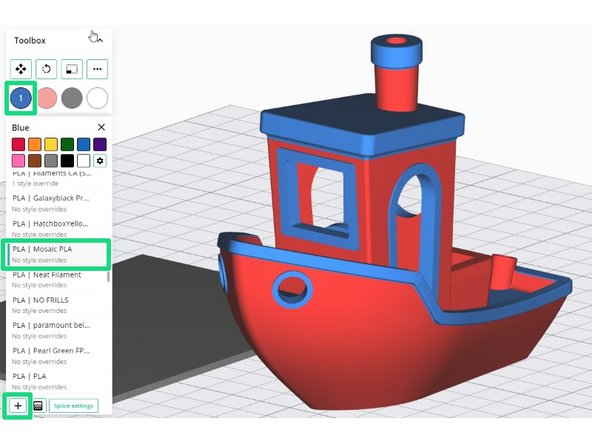
Create custom material profiles that can be selected for each input drive on Palette.
-
Style overrides allows certain settings to be used when that material profile is selected by a drive.
-
Having custom material profiles allows for each filament brand or different finishes to have its own settings.
-
Manage material profiles from the main menu, or Open Project > Select Tool/Color > Select or Add New Material.
-
-
-
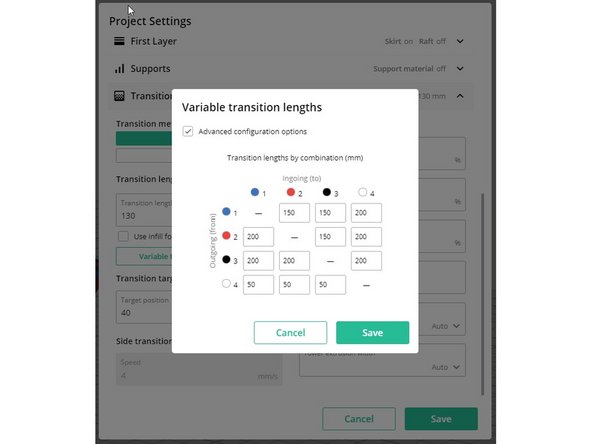
Variable transition lengths allows for purge lengths to be specified between drives and colors used, assisting with reducing color bleed during printing.
-
Use variable transitioning to purge more for strong colors such as black and red, and reduce the purge amount when transitioning from light colors.
-
Variable transitioning is available when you open a project > Project Settings > Transition > Variable Transitions.
-
-
-
Side transitioning allows material to be purged off the bed or on a specified coordinate. This method of color transitioning can help reduce print time and waste.
-
Side transitioning is compatible with BigBrain3D when using Palette in connected mode.
-
Side transitioning firmware settings (purge location) are available when you edit a printer profile. Transition and purge amount settings are available under Project Settings > Transition > Side transition.
-
-
-
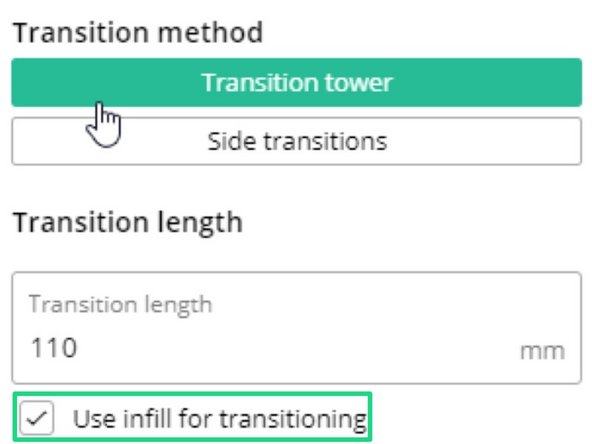
Infill transitioning uses available infill as part of the transition allowing you to reduce the tower size, overall waste, and print time.
-
Canvas will attempt to use the most recent part of the infill as part of the transition sequence.
-
This method is not recommended if soluble supports are used in the print.
-
This is available under Project Settings > Transition > Use infill for transitioning
-
-
-
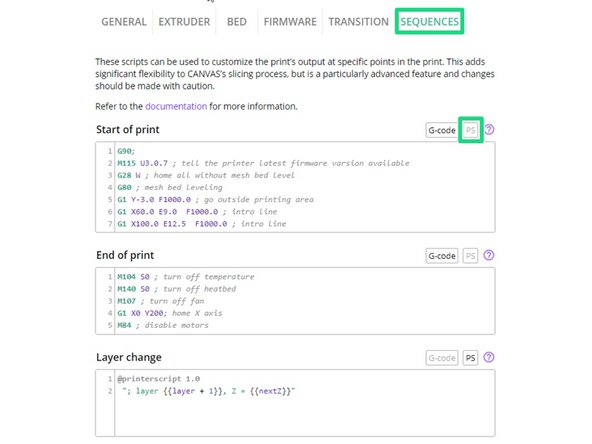
PrinterScript allows for advanced sequencing in starting scripts, ending scripts, side transitions, layer changes and material changes.
-
Here's a tutorial on how PrinterScript can be used to add a pause when a layer is reached, in order to do a filament change. This expands the number of colors used in the print.
-
This is available under Printer Profiles > Select/Edit Printer Profile > Edit Printer > Sequences.
-
-
-
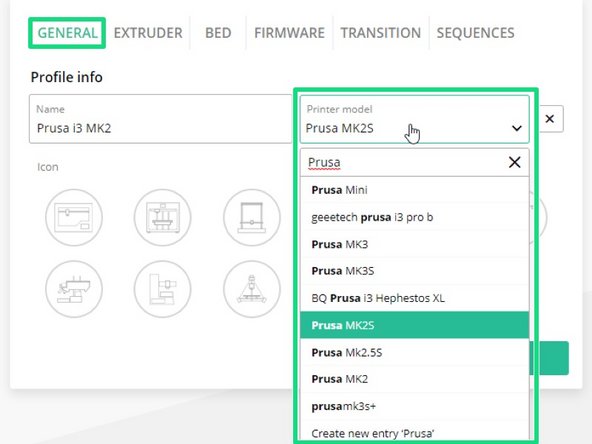
Printer tagging aggregates data from other printer profiles. This helps inform what values or settings to use in the printer profile.
-
Select from existing printer models, or create a new entry if the printer is not available.
-
Printer tagging is available under Printer Profiles > Select/Edit Printer Profile > Edit Printer > Printer Model.
-
-
-
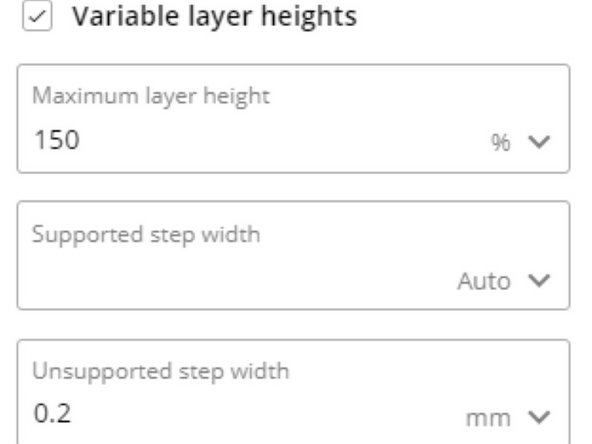
Variable layer heights allows the slicer to automatically and smoothly change between a minimum and maximum layer height.
-
Minimum layer heights are used where parts have shallow slopes, such as on top of a sphere.
-
Maximum layer heights are used for steep slopes or vertical walls.
-
This is available under Project Settings > Layer > Variable Layer Heights.
-
-
-
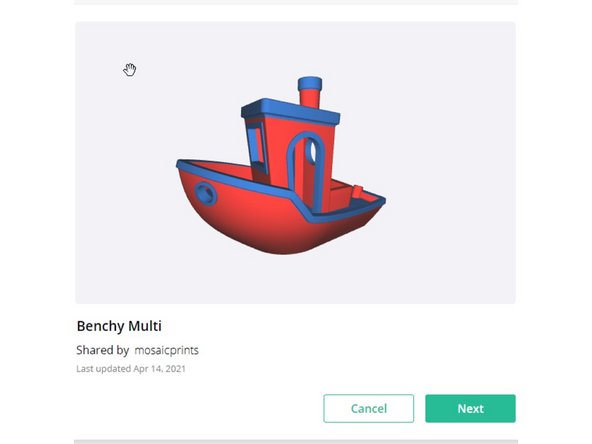
Sharing allows for printer profiles, style and setting profiles, material profiles and models to be shared with others.
-
Enabling sharing allows others to import the above mentioned with a URL.
-
Sharing is available within an open project, or from the Projects dashboard.
-
Have a feature request or want to share feedback? Please visit Canvas on Github or our contact page. Thank you!
Have a feature request or want to share feedback? Please visit Canvas on Github or our contact page. Thank you!
Cancel: I did not complete this guide.
5 other people completed this guide.
