
Introduction
Once you have finished splice tuning to determine what settings to use between two different types of filament, please follow the instructions below to ensure that these settings are used during your print.
-
-
To use the heat, compression, and cooling factors found during splice tuning, open your project and click on a color swatch. The color swatches in the toolbox correspond to the input drives on Palette.
-
Create a new material profile by selecting Add New Material. Enter the name for the material profile and save. Repeat this step for other materials you are splicing with (e.g. different material types, or different filament brands/manufacturers)
-
Alternatively, create a new material profile from the Materials tab on your homepage
-
Once your materials are created, select one of the custom profiles and click Splice and transition, then Splice Settings. You’ll be able to select your materials and enter the splice tuning values in the next step.
-
When printing with PLA, often only one profile is needed to start, as these settings can be used across different filament brands. Multiple PLA profiles may only be needed if you find that one spool to another requires additional tuning.
-
An example of this would be where your splice tuning of 1,1,1 for PLA works for most of your filament, but you find that between two different spools, additional heat is required to strengthen the splice for this particular combination.
-
-
-
Splicing same material: If the ingoing and outgoing materials are the same (ex. PLA - PLA), the splice parameters will also be the same regardless of which material is fed into Palette first.
-
Only one set of values will be needed, and the option to reverse the ingoing and outgoing material will be disabled.
-
This would be used for different filament colors of the same manufacturer or material type. Only one material profile with custom splice tuning is needed.
-
Splicing different materials: If the materials are different (ex. PLA - PETG, or two different brands of PLA that need tuning), the splice parameters may be different depending on the material being pushed (ingoing) and the material already in the splice core (outgoing).
-
Two sets of splice tuning values are possible with the ability to reverse the direction of the splice.
-
This would be used when the intended materials used for the print are of different filament types or from different manufacturers, where the splice tuning is required to strengthen the bond between the different materials.
-
The ‘outgoing’ filament is being heated at a standstill while the ‘ingoing’ filament is being pushed into the molten filament, compressed, and cooled to create a splice. During splice tuning, after one combination has been tested, swap the filaments in drives 1 and 2 for the reverse splice values.
-
Once your splice tuning values are set, select Save to have these settings applied to your material profiles when they are used in a project (more on this in the next step).
-
-
-
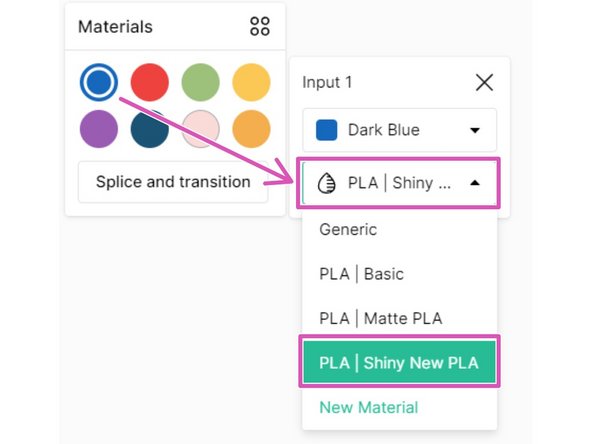
Printing with the same material: When returning to the project, on the toolbox click on a color swatch to check that the right material profile is selected for each drive.
-
In this example, drives 1 and 2 are of the same material but different colors will be loaded into Palette. If any remaining drives are used for this print, please ensure the material profile is also selected.
-
Drives 1 and 2 will use the one set of splice tuning values saved for the Shiny New PLA profile saved in the last step.
-
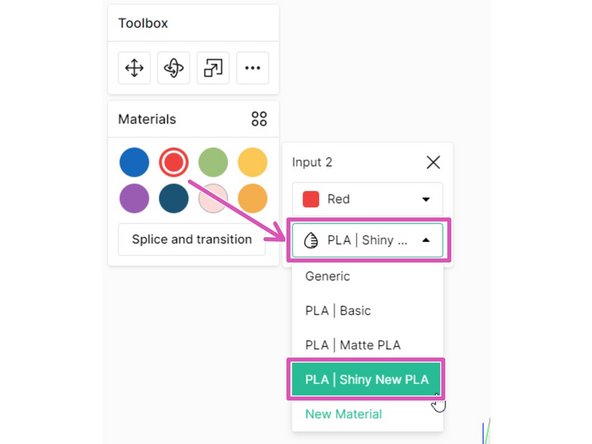
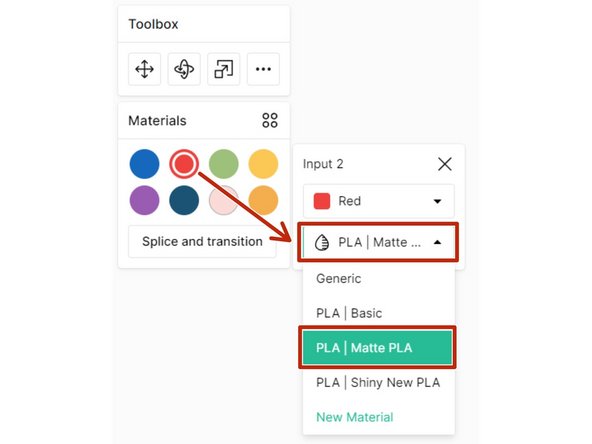
Printing with different materials: Click on a color swatch to select the right material profile for each drive.
-
In this example, drive 1 is using the Shiny New PLA profile like above, but drive 2 will be using the Matte PLA profile. Select the intended material profile to be used for any remaining drives.
-
Because we have two different material profiles selected for drives 1 and 2, any splices between these two drives will use the two sets of splice tuning values saved between Shiny New PLA and Matte PLA in the last step. This includes the default order, and the reverse material order.
-


If you have any additional questions, please send a message to us at support@mosaicmfg.com.
If you have any additional questions, please send a message to us at support@mosaicmfg.com.
Cancel: I did not complete this guide.
8 other people completed this guide.
