
Introduction
How to use Canvas Painting and Printerscript with Palette's Change Filament feature to use more than four colors in a print.
Video Overview
-
-
Upload your models. For painting, if you're uploading multiple models, upload them as single color first. If you accidentally upload as multi-material, simply ungroup the models.
-
Arrange and scale the models into position.
-
-
-
In the Canvas toolbox, the color swatches correspond to the four input drives on Palette.
-
Determine which drive you would like to change for another color during the print. The colored and regions should be from the same color swatch in the toolbox, so that Palette will splice from the same input drive.
-
Note: In this example, the backpack and top of the hat are painted red to indicate we are using drive #2. The pause for the filament change is just after the backpack is finished printing, so in the actual print, the top of the hat will be a different color.
-
-
-
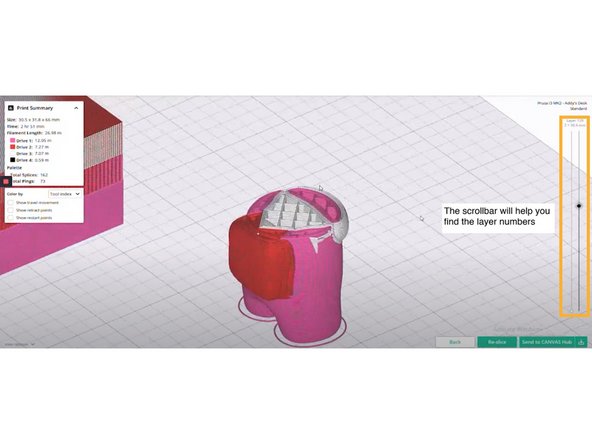
After slicing, preview the project. The scrollbars on the right will allow you to preview the print by layer. For this guide, we use the layer number and not the layer height.
-
The pause for changing filament should be at least a few layers before it's expected to show on the model. This is because the new filament has to travel through Palette and the outgoing tube to reach the nozzle next time it's spliced.
-
Note: It can be easier to time pauses when using the short tube on Palette so that it has less distance to travel to reach the nozzle. It also helps if the tool/input drive used for the new filament has some infill regions to print first before it will be visible on the exterior of the print.
-
The following method of timing filament pauses can help provide an estimate of when to pause. It is only an estimate because there may be fluctations based on the printer's e-steps, and Palette's own calibration. Ensure that your models are at your desired dimensions, and then slice the project as is and upload the G-Code to gcode.ws.
-
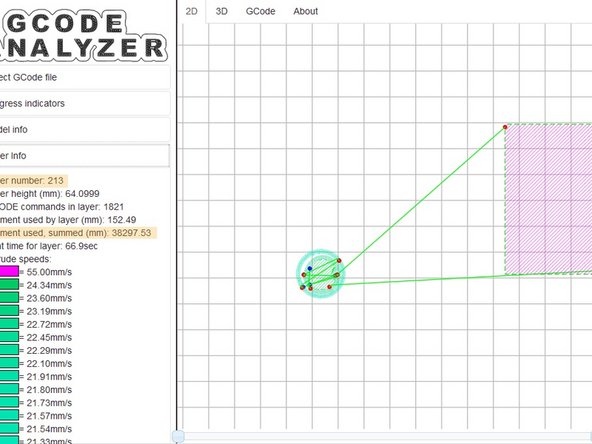
Knowing the layer number where you want the new color to appear, use the scrollbar to find that layer and see the filament used, summed (mm) in the Layer info panel. From this sum, subtract your printer profile's (LO + 250mm). Scroll down to the layer where this new amount is used cumulatively, this is the layer where the pause can be added.
-
For example, layer 50 is where we want the new color to appear. Layer 50 has 10000mm of filament used. Our printer profile LO is 875, we add 250 to total 1125 (the estimated distance the filament has to travel). 10000 - 1125 = 8875. Use gcode.ws to determine which layer has about 8875mm of filament used, summed. This is the layer we add a pause.
-
-
-
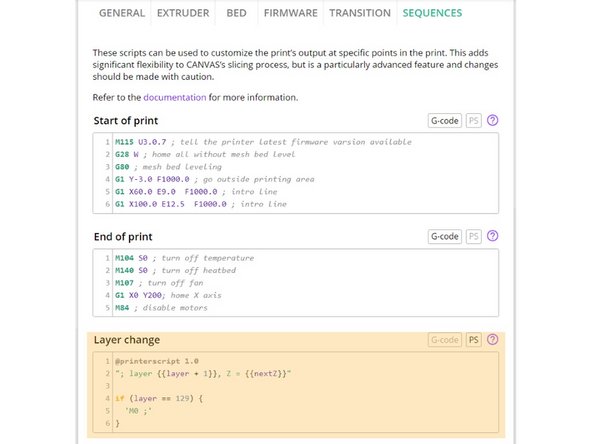
Go to Printer Profiles > Select/Edit Printer Profile > Edit Sequences. Here you will find your start and end sequence, layer change and side transitioning sequences. For this tutorial we are editing the Layer Change sequence.
-
PrinterScript is a programming language that works with your printer sequences that allows for more advanced customization. Please see the PrinterScript documentation and proceed with caution as editing these sequences will affect your printer.
-
The following script can be used for entering a pause, where x is the layer number. In this tutorial, the purpose of the pause is to change an input drive on Palette so we will use M0. Note: M600 pauses can be used when not printing with Palette, for the purpose of changing filament on the extruder where color changes are occuring by layer.
-
if (layer == x) { "M0 ;" }
-
Review the script and layer number, and then Save.
-
-
-
Navigate back to My Projects > Open Existing Project
-
Click Preview > Re-Slice
-
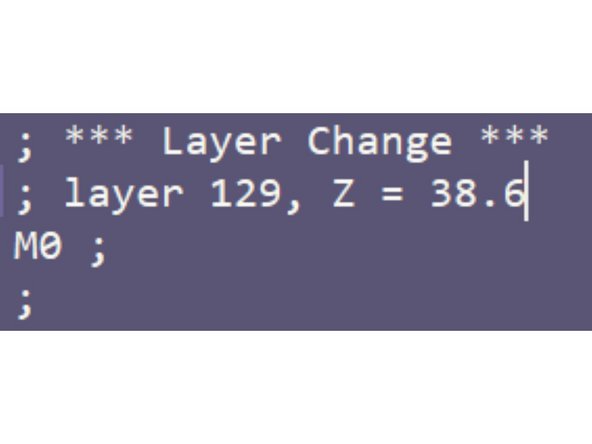
Validate the layer change script by downloading the files. Open the G-Code file in a text editor and search for M0. Check that the pause is there when the specified layer number is reached.
-
-
-
Start your print in accessory mode or connected with Canvas Hub.
-
The spoolholder provided with Palette has room for five filament spools, but you can also place the additional filament on a single spoolholder.
-
The printer should pause at the layer entered in Canvas. When the printer pauses, filament consumption is also paused so Palette will simulataneously pause its splicing.
-
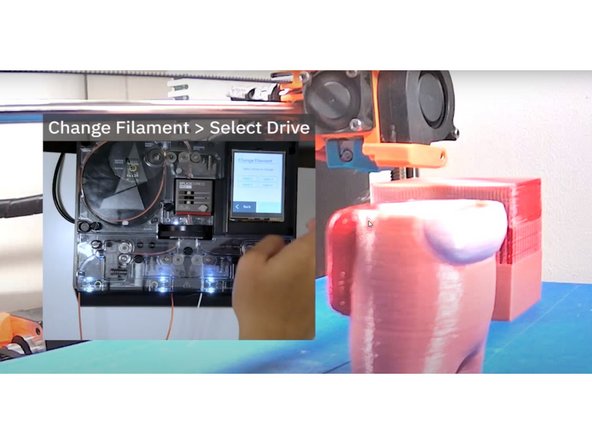
Tap Palette's menu on the bottom right and then select Change Filament. Palette will prompt you to select which input drive to unload. Once reloading the new spool is complete, the print will resume.
-


If you have any additional questions, please send us a message at support@mosaicmfg.com.
If you have any additional questions, please send us a message at support@mosaicmfg.com.
Cancel: I did not complete this guide.
One other person completed this guide.
