Introduction
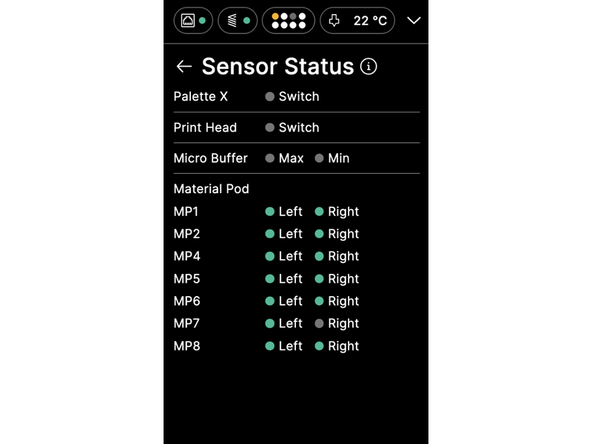
The Sensor Status screen allows users to test that all the sensors in Element are detecting filament correctly. Element needs to be updated to firmware v2.10.0 or higher to use this feature.
Use the following steps to test the individual sensors in Element and troubleshoot any issues. Please contact support@mosaicmfg.com to report any persistent issues and receive next steps.
-
-
On Element Desktop, access the Sensor Status screen under Settings > Troubleshooting > Sensor Status when not printing
-
During printing, access under More > Sensor Status
-
On Array, access the Sensor Status screen for individual Elements from the front screen, under Element > Troubleshooting > Sensor Status
-
Alternatively, access from the back screen under Element > Sensor Status
-
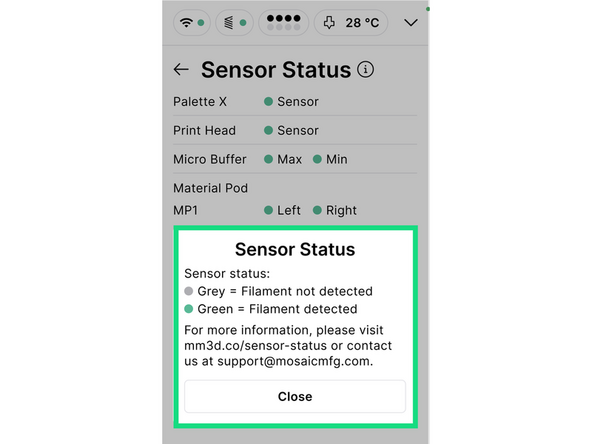
A grey sensor status indicates that filament is not detected by the sensor at that location in the system. Green indicates that filament is detected.
-
-
-
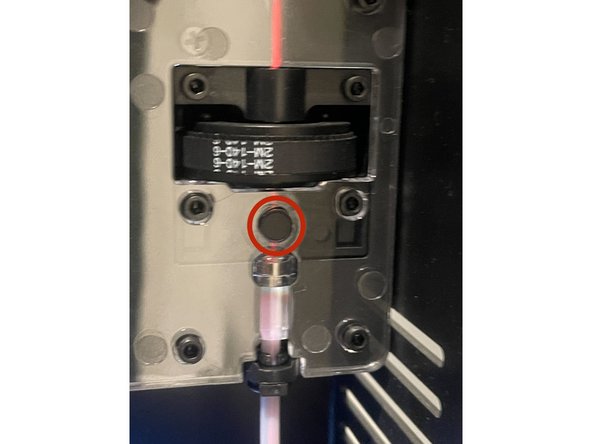
In the Palette X assembly, the sensor is located just below the cutter. To test the sensor, feed filament through Palette X manually, or by using Material Pod controls under Materials > Drive
-
If filament cannot pass the cutter, perform a cut operation under Controls > More. If the issue persists, refer to Cutter Troubleshooting
-
If the sensor status is green without feeding filament through Palette X, refer to steps 4 and 5 of our Filament Pathway Inspection and Clearing Guide. There is likely a small piece of filament broken inside Palette X that needs to be cleared
-
If Palette X is clear of debris, but the sensor status does not correspond properly to whether filament is present at the sensor, please contact support@mosaicmfg.com
-
-
-
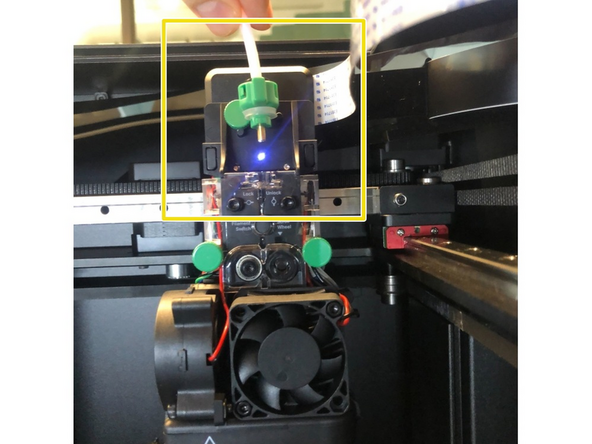
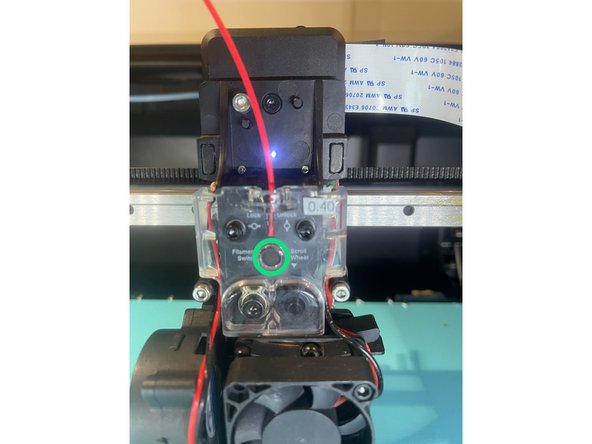
To test the Print Head sensor, remove the PTFE tube from the top of the Print Head using the quarter-turn mechanism
-
The sensor is located below the acrylic cover, labelled 'Filament switch'
-
Insert a piece of filament into the Print Head and check the sensor status. If the status does not correspond properly, please follow the steps in our Print Head Disconnection article and contact support@mosaicmfg.com
-
If you cannot insert filament into the Print Head, as there is already a piece inside, refer to Clearing the Print Head
-
-
-
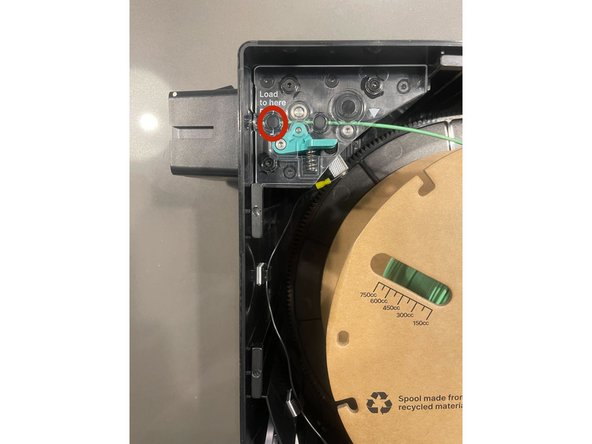
If a Material Pod is feeding constantly throughout a print, this can indicate an issue with the microbuffer sensors
-
To access the microbuffer on Element Desktop, remove the back panel of the printer. Take care not to strip any screws - go slowly and use consistent force
-
On Element Array, the microbuffer is openly accessible at the back of each printer
-
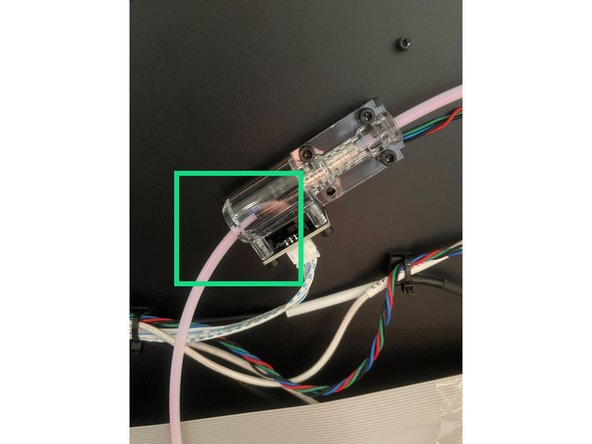
The first picture shows the microbuffer in the 'min' position. To put the microbuffer in the 'min' position, push the ingoing tube all the way to the right, into the microbuffer
-
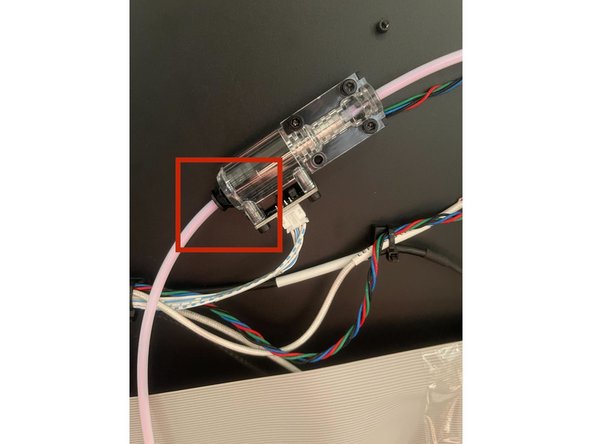
The second picture shows the 'max' position. To put the microbuffer in the 'max' position, pull the ingoing tube all the way to the left, away from the microbuffer
-
If the sensor status is not corresponding properly to the microbuffer position, clean any debris out of the microbuffer by disconnecting the tubes and using compressed air. If the issue persists after cleaning, contact support@mosaicmfg.com
-
-
-
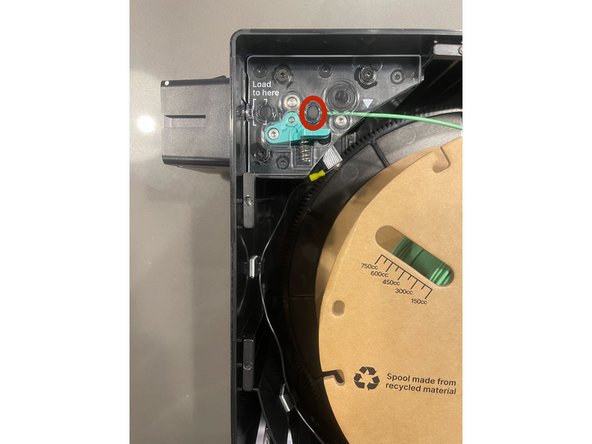
There are two sensors in each Material Pod. The filament will contact the right sensor first, and then the left.
-
With the Material Pod installed in Element, you can check these sensors are working properly. Report any issues to support@mosaicmfg.com
-
If you see a failure when Element is switching between Material Pods during a print, please note the sensor statuses of both Material Pods when reporting the issue to Mosaic Support
-


Team
