Introduction
Element uses the transition system for each material change, as well as at the start and end of each print. This guide offers installation instructions, as well as maintenance tips to help ensure the TS continues to operate as intended.
If you see blobs or material form in, on, or around the TS, this could indicate that the nozzle is not aligned correctly during purging, or the Transition System isn't functioning correctly. By following the steps below, you can recover from this position and resolve the misalignment.
-
-
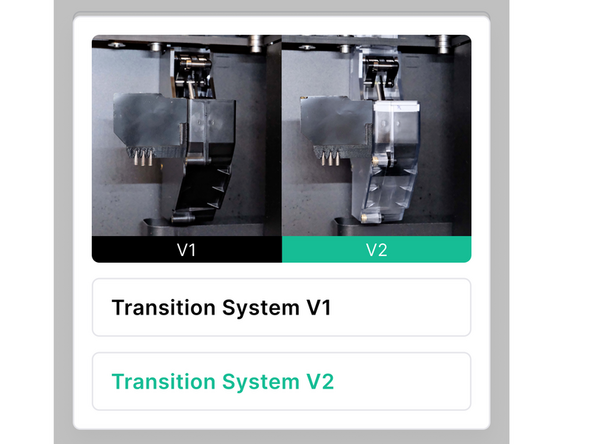
Use our Installing Transition System guide for instructions on how to uninstall your TS V1 and install TS V2
-
Note: Previously sliced projects will need to be resliced to account for the change in TS
-
-
-
If the printer is not homing XY correctly, this will cause issues at the Transition System
-
Follow our full XY Homing Error guide to test XY homing and resolve any failure
-
If XY is homing correctly, proceed to next step
-
-
-
Check that the top two screws on the Transition System are fully tightened
-
Clean the inside of the Transition System of any material. Ensure that the swing fully actuates
-
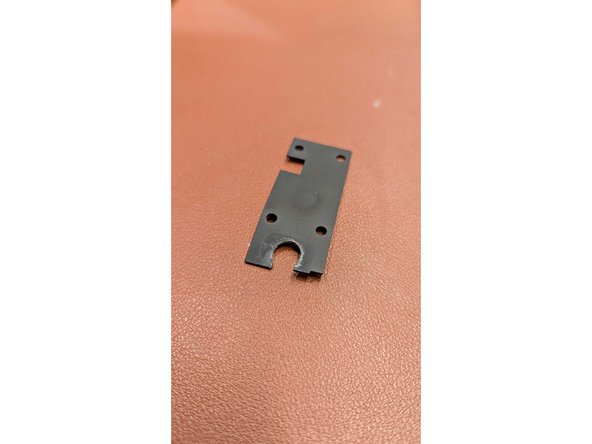
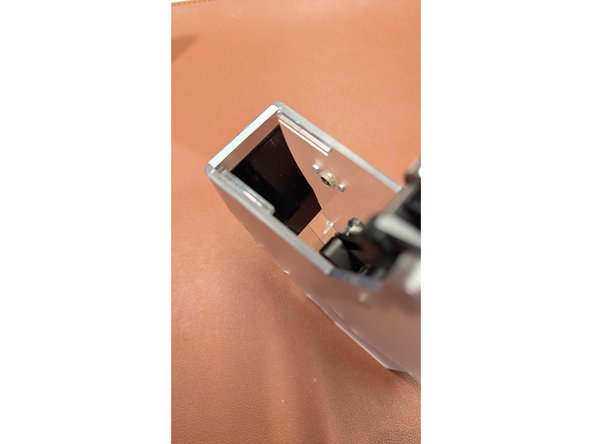
Check if the swing cover is bent or damaged, as in the photo. If so, contact Mosaic for a replacement.
-
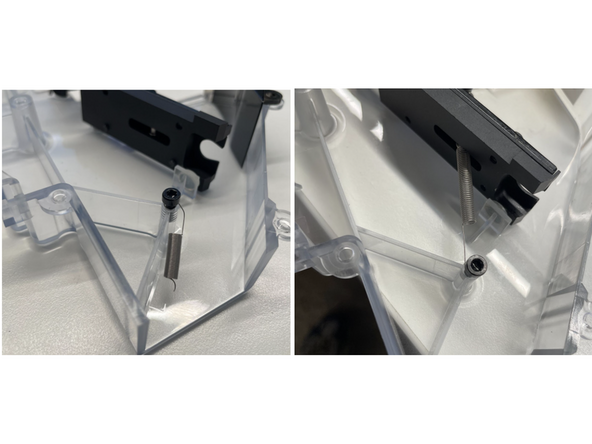
Examine the spring under the swing to ensure it is securely attached. If the spring is broken, contact Mosaic for a replacement.
-
From the side, check if the lip is bent or damaged. If so, contact Mosaic for a replacement
-
-
-
Check that the two clam shells are fully snapped together. If there is a visible gap, try squeezing the two shells back together
-
You can jiggle the metal lip sightly to get it into position as you squeeze the clam shells together
-
-
-
Certain materials can cause a buildup of oils on this component over time. This buildup can prevent material from being ejected into the transition container and lead to the TS not functioning as intended.
-
If you see an increase in material buildup, or notice stringy chips in your transition container, this indicates that the slide needs to be cleaned. This can be done periodically by using warm soapy water, followed by water, and finished with a dry towel.
-
-
-
Clean the hot end by heating nozzle and using a wire brush, or similar, to clean any excess material
-
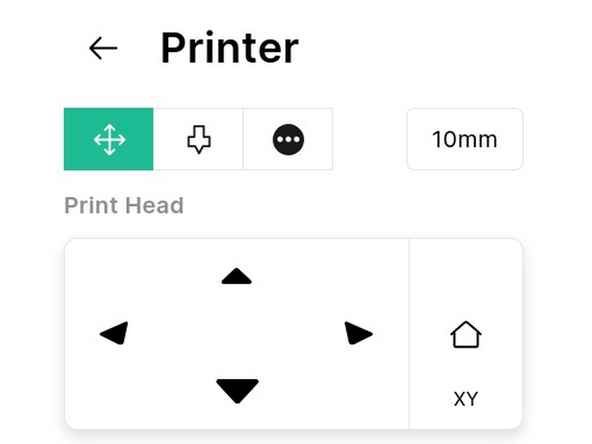
Load material into the Print Head and check that the hot end can extrude, using Printer > Controls
-
Turn off Element and remove the Print Head. Check if the nozzle looks skewed, as in the photo. Share with your Account Manager or support@mosaicmfg.com for confirmation
-
-
-
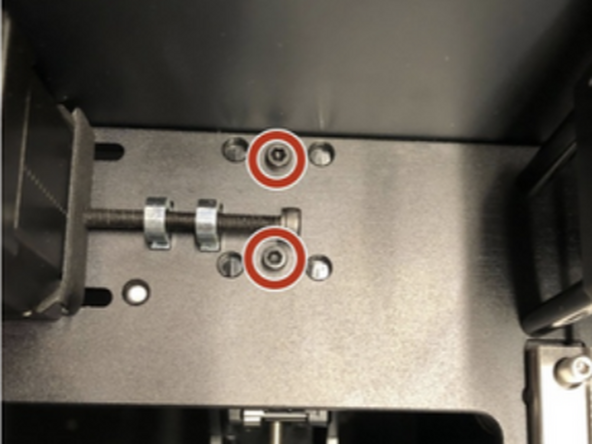
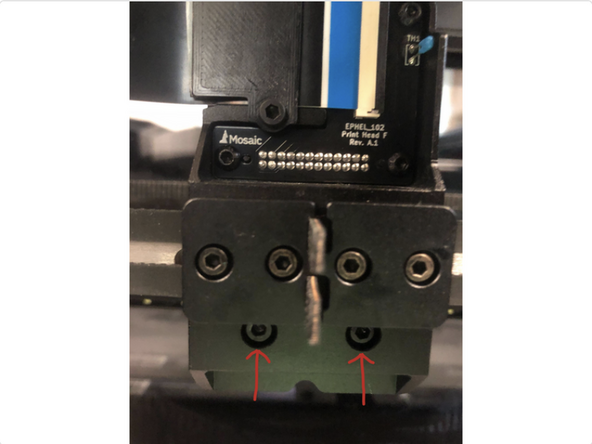
A possible cause of misalignment is due to a skewed or loose fixed end. To check for this, turn off Element and remove the Print Head
-
Tighten these two screws on the bottom of the fixed end, while pushing straight down firmly on the top of the fixed end
-
-
-
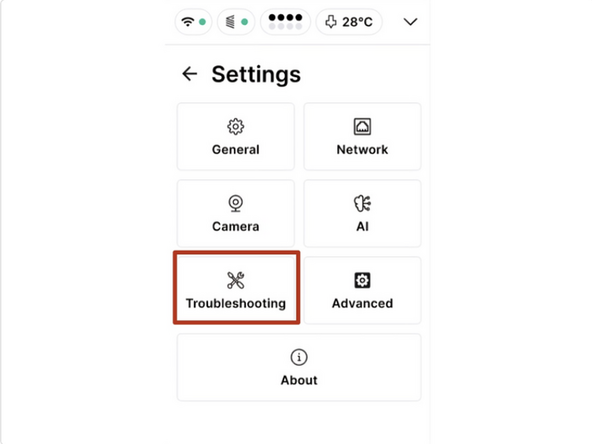
If the Transition System and print head are in working order, it's now time to test TS alignment. Proceed to Settings > Troubleshooting to begin the testing workflow
-
Make sure the nozzle is clean, then begin the TS alignment check. The Print Head will home in XY and Z, then move to the alignment position at the TS
-
Following the on-screen instructions, check that the nozzle is aligned with the left edge of the rectangular heat block, on top of the swing. Adjust and retest the alignment as necessary, before saving. Monitor performance at the start of the next print.
-
The maximum adjustment is 2mm in either direction. If this is insufficient to for correct alignment, you are likely seeing an XY Homing Error. Contact support@mosaicmfg.com for more help
-

Cancel: I did not complete this guide.
2 other people completed this guide.

Team
