Introduction
In this guide you will learn:
- How to create and edit material profiles in Canvas for Element printing
- How to use material profiles in projects
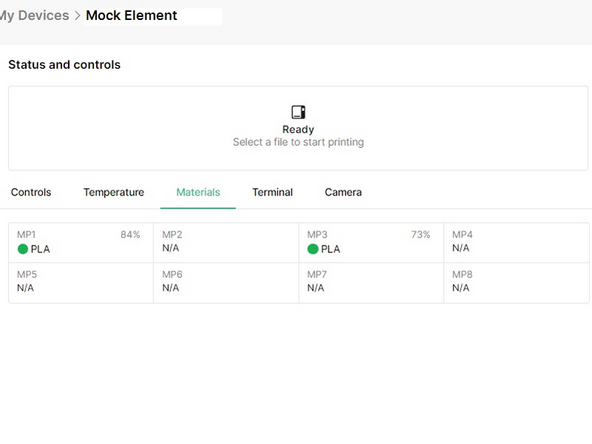
- How to view filament amounts used on a connected Element printer
Please see this guide on how to install material pods.
-
-
Go to canvas3d.io > Materials on left menu. Click "New Material."
-
Select Mosaic materials, to use material profile presets.
-
Select third-party materials, to create a custom material profile.
-
Style overrides are slicer settings that are used only when that material is selected within a project.
-
You may change temperature, speed and some extrusion settings for each material profile.
-
Colors can also be added to a material profile, so they can be selected when working with a project.
-
-
-
Please see here for full Element Slicing instructions.
-
To select a material profile for printing, create a new project or open an existing one.
-
Under Materials, select one of the color swatches.
-
From the dropdown menu, select the material profile and color.
-
To ensure that this material is being used for a model, click and drag the color swatch over the model or the file name in the Objects window on the right.
-
Important: Please ensure that the same material and color selected in the project is also loaded onto Element using Material Pods, to ensure that the print initiates correctly.
-
-
-
Please follow these instructions to link Element to Canvas, in order to view, monitor and control Element.
-
Open the Element device view by going to Devices, and double click the connected Element printer. The materials panel will provide information on where material pods are installed.
-
Learn more about the device view and Element controls.
-
If you have any additional questions, please send us a message at support@mosaicmfg.com
If you have any additional questions, please send us a message at support@mosaicmfg.com
Cancel: I did not complete this guide.
4 other people completed this guide.


