Introduction
In this guide, we will cover:
- how load cells work
- where you can find your load cell values
- how you can adjust them to improve your bed mesh
-
-
Load cells are sensors that detect force. When force is applied to a load cell, it converts the force into an electrical signal.
-
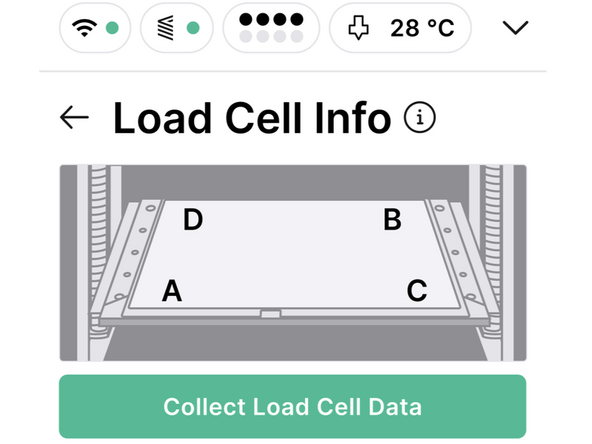
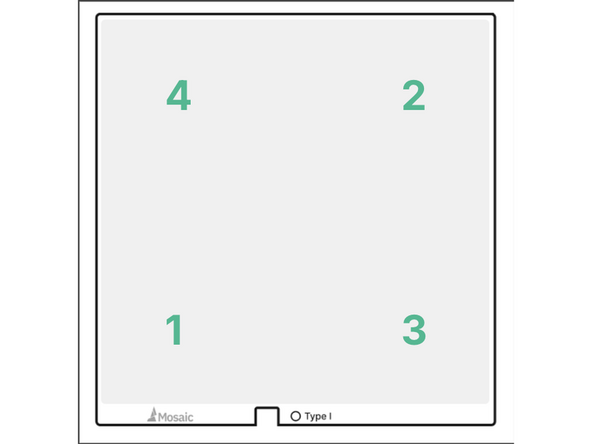
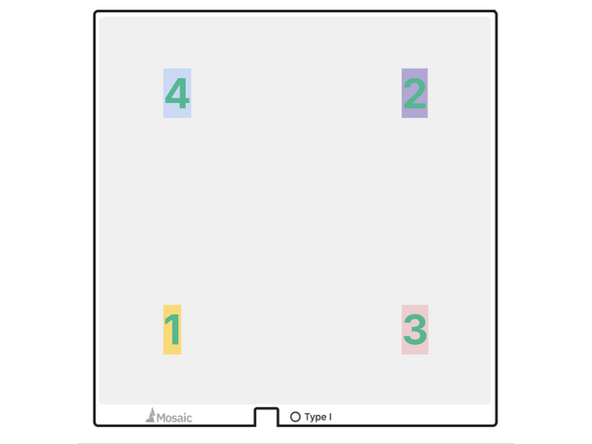
Element's bed assembly contains 4 load cells. At the start of each print, there is a 49-point levelling procedure where the nozzle presses into the build plate. The force detected at each of these contact points is then used to create a bed mesh.
-
An accurate bed mesh is needed to ensure a quality first layer, which is key to overall print quality.
-
-
-
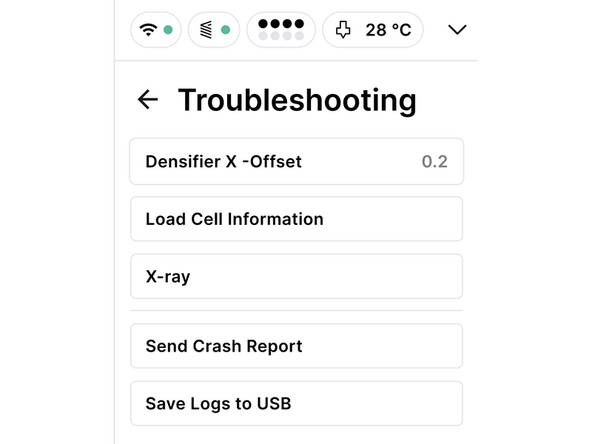
Before we get started, ensure a build plate is installed on Element's bed assembly. Then, from Element's screen, navigate to Settings > Troubleshooting and select Load Cell Information
-
On Array, you can find this by navigating to Element > Troubleshooting and scrolling down to Load Cell Information
-
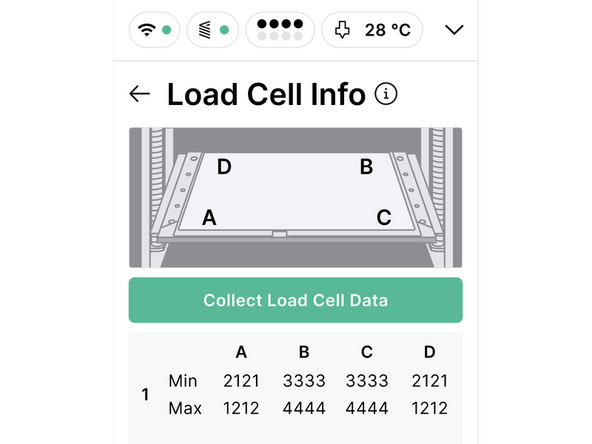
From this screen, select Collect Load Cell Data
-
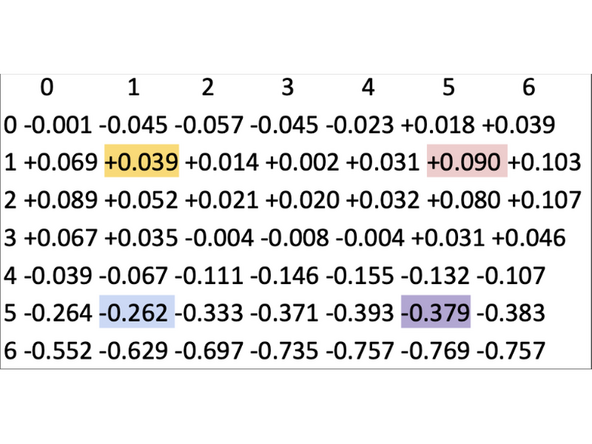
You will receive min/max reading for each Load Cell. These values should ideally be between 1200-1600. More importantly, to ensure bed flatness, they should be as close to each other as possible.
-
If a build plate is not present when Load Cell data is collected, all LC's should give a reading of 2048
-
If one or more of your Load Cell values are displayed in red, please contact support as you will most likely need to replace the affected load cells and/or your load cell amplifier board.
-
-
-
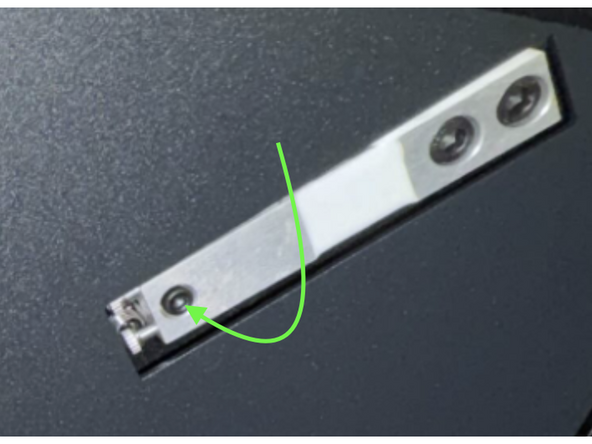
Each load cell has a bolt that can be adjusted, should the collected values not be in the acceptable range.
-
It is recommended that you contact Mosaic Support prior to attempting any adjustments on the load cells. Once we have your load cell readings, we can give advice on what adjustments are needed in order to get them closer to the desired value.
-
-
-
From the Terminal in Canvas, you can run a bed mesh manually to get an idea of overall bed flatness. (See Step 5 of our Bed Leveling Troubleshooting guide). This is helpful information to have should you need to make any adjustments to your Load Cells.
-
If your printer continually fails during the bed levelling procedure, it could be due to a load cell needing to be adjusted or replaced
-


Cancel: I did not complete this guide.
One other person completed this guide.

Team
