
Introduction
Canvas is a cloud and web-based application designed for multi-material 3D printing.
Canvas allows you to color and slice single or multi-color models.
This guide provides an overview to get started with Canvas for use with any Palette model.
For a guide for using Canvas with Element/Array, please click here instead.
-
-
Visit Printers and click on New Printer
-
Printer profiles can be 1) created as a new profile 2) imported from Simplify3D, Slic3r/Prusaslicer, or Kisslicer and 3) based off of a printer preset.
-
Custom start and end sequences for bed leveling can be copied into the printer profile.
-
Please see here for more information on how to create a new printer profile.
-
After creating a new printer profile, there will be the option to create a setup for that profile. If this step is skipped, a new setup can still be manually created afterwards.
-
-
-
Style profiles are slicer settings. Multiple profiles can be created for various printing results.
-
Importing a printer profile from another slicer will create a new style profile based on existing settings.
-
Creating a new style profile will automatically populate the settings. It would be recommended to run a single-color test print with these settings and further tuning the profile afterwards (e.g. extrusion widths, layer heights, speeds)
-
Printer tagging allows for common settings to appear when hovering over tooltips for each project setting.
-
Please see here for more information on creating a style profile and the settings glossary.
-
-
-
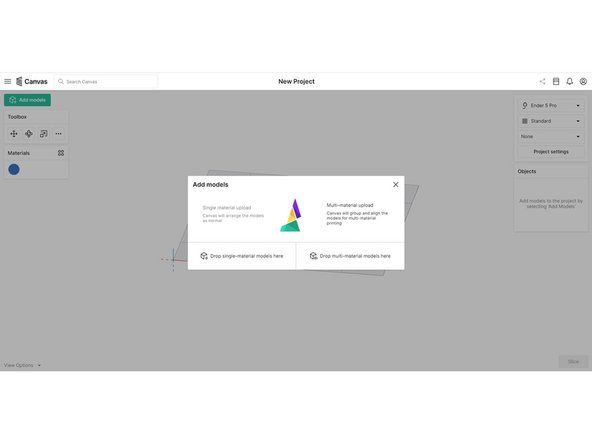
Visit Projects and click New Project.
-
A project is where models can be customized for printing.
-
Creating a new project will first prompt to upload models. If the model is one part, upload as a single-color print. If the model is multiple parts, upload it as a multi-material print.
-
-
-
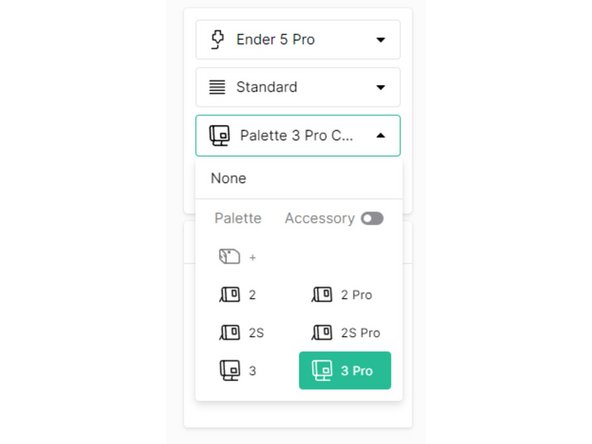
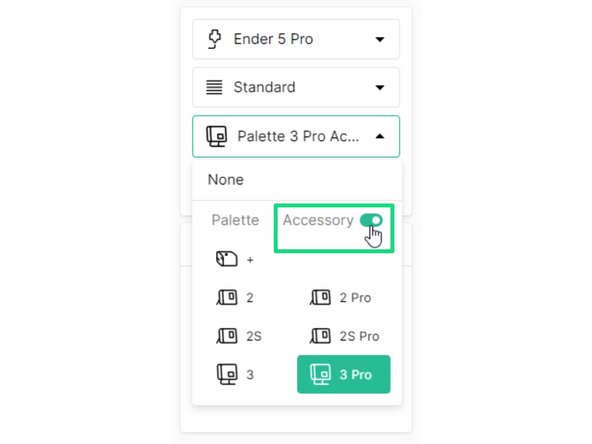
On the top right of the project view, select the desired printer profile, style profile and Palette model.
-
For Palette 2 and 3, connected mode will be selected by default.
-
Use the toggle to enable accessory mode for Palette.
-
For Canvas Hub, select Palette 2 in connected mode. With the Canvas Hub linked in Canvas, files can be transferred to it after slicing.
-
-
-
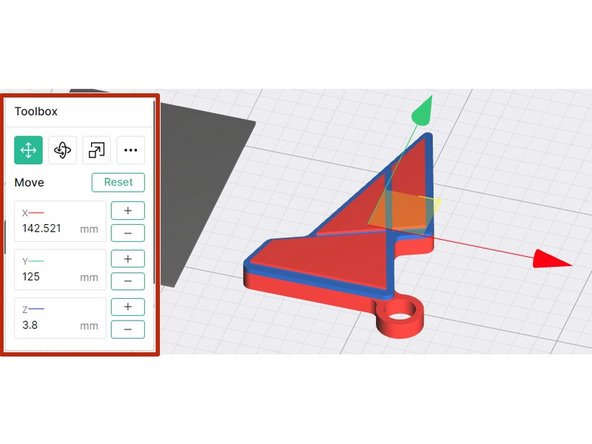
Toolbox: Tools are available for translating/moving, rotation, and scaling.
-
More options in the toolbox include auto-arranging models, laying faces to the bed, dropping models to the bed, and custom supports.
-
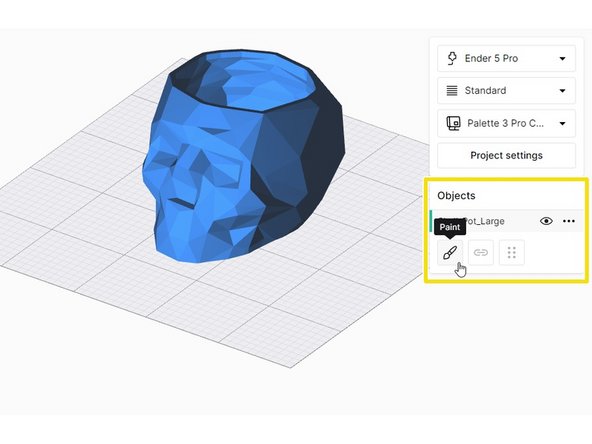
Objects: Grouping and Ungrouping Models - Select multiple models in the object browser by holding ‘Shift + Left Click’ on the models. Click the link button on the bottom of the object browser to group or ungroup the models selected.
-
Objects: Duplicating a Model - Click the model you would like to duplicate, and then click the copy button on the bottom left of the object browser.
-
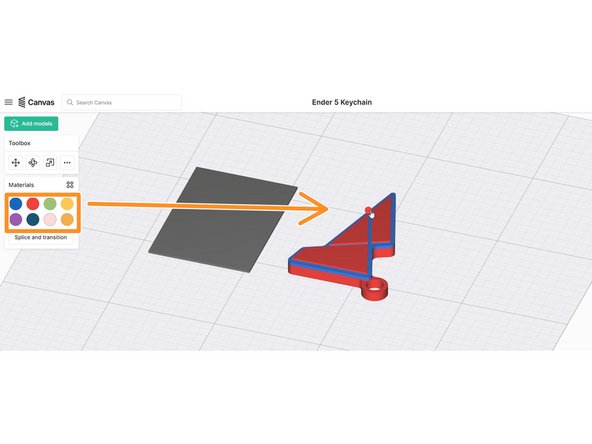
If the model has multiple parts, color the model by dragging and dropping colors from the toolbox onto the model or the file name in the Objects
-
When working with multi-material projects, the transition tower will be auto-generated once colors are selected to each body.
-
If only one STL is uploaded, the model can be customized with painting. To paint a model, select the STL in the object browser and then 'Paint.'
-
-
-
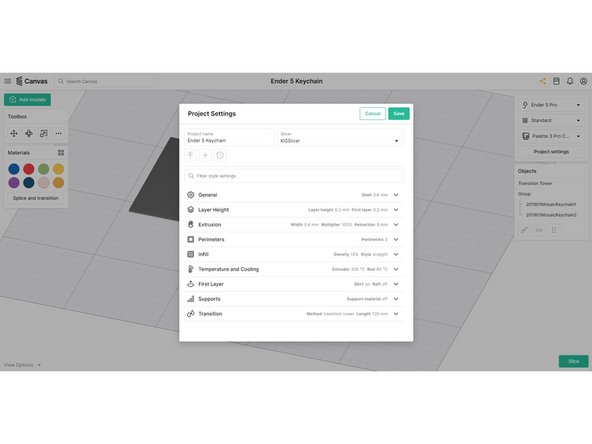
Based on the style profile selected from the projects screen, expanded slicer settings are available.
-
For Palette printing - Transition Settings: The transition length determines how much filament will be purged on the transition tower. Please see variable transition settings to learn more about this setting to help with bleed.
-
Project settings can be:
-
Saved to the existing style profile, overriding the previous settings. This will enable any saved changes to be used next time the style profile is selected.
-
Saved as a new style profile, separate from the one first selected in the project.
-
Reverted to the original style profile if any erroneous changes were made to that project.
-
-
-
Slice your project. Preview layers and toolpaths by tool index, path type, layer height, print speed, fan speed and print temperature. For multi-material printing the preview will also display number of splices and pings.
-
Palette 3 Accessory Mode: Download the files, and extract the folder. Transfer the MAFX file to the USB drive for Palette, and transfer the G-Code to the storage device for the printer (e.g. USB key, microSD, SD, WiFi)
-
Palette 3 Connected Mode: If Palette 3 is linked in Canvas, MCFX file can be sent to it directly. Or, the MCFX file can be transferred to Palette's USB drive.
-
Palette 2 Accessory mode: Download the files, and extract the folder. Transfer the MAF file to the SD card for Palette, and transfer the G-Code to the storage device for the printer (e.g. USB key, microSD, SD, WiFi)
-
Palette 2 Connected Mode: If Canvas Hub is set up and Canvas account is linked and connected, send the print directly. The file can also be downloaded and uploaded to Octoprint manually.
-


If you have any additional questions, please send us a message at support@mosaicmfg.com.
If you have any additional questions, please send us a message at support@mosaicmfg.com.
Cancel: I did not complete this guide.
17 other people completed this guide.
