Introduction
In this guide you will learn:
- What is a print job and order
- What is a print queue?
- How to slice for Array
- How to send to device
- How to manage and modify print jobs and orders
What are Orders, Jobs and Quantities?
An order is associated with a sliced project (DAF) in Canvas.
A job is a single print run on Element, the progress for each job can be monitored. The number of jobs (or quantity) within an order, are the number of times that this DAF will be run.
What is the Array Queue?
Array utilizes a print queue to schedule print jobs across the four integrated Element 3D printers. This queue can be managed directly from the front screen of Array or via a linked Canvas account. Please follow this guide on how to connect Canvas to Array.
-
-
Create a new printer profile by going to Printers > +New Printer > Preset
-
If you're using an LT Print Head, use the 'Element' profile. The 'Element HT' profile is only for use with HT Print Heads.
-
-
-
Visit the Projects menu. Click the +New Project button on the right.
-
-
-
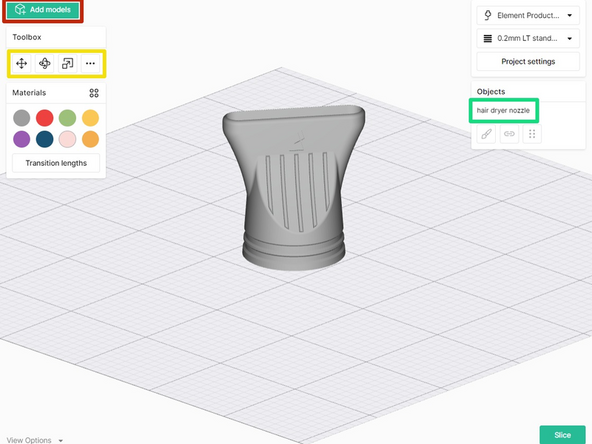
Click the Add Models button, or click and drag files from your file explorer directly into the browser.
-
STL files of up to 100MB are compatible with Canvas.
-
Use the toolbox to move, scale and rotate the model. More Options (...) will allow you to auto-arrange, lay a face to the bed, or drop the models to the bed.
-
Selecting the model in the Objects panel will allow you duplicate the model.
-
-
-
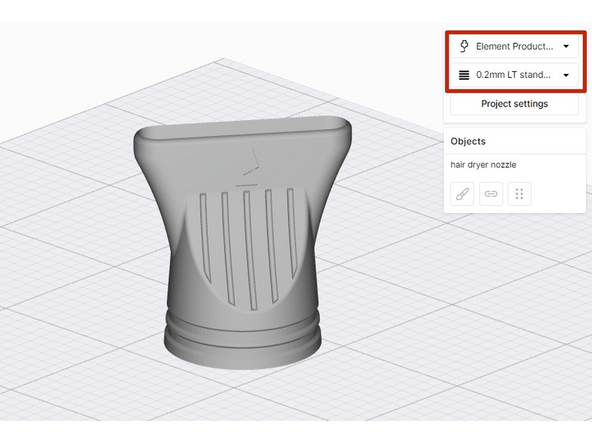
From the top-right menu, select the Element Printer profile and Style profile.
-
-
-
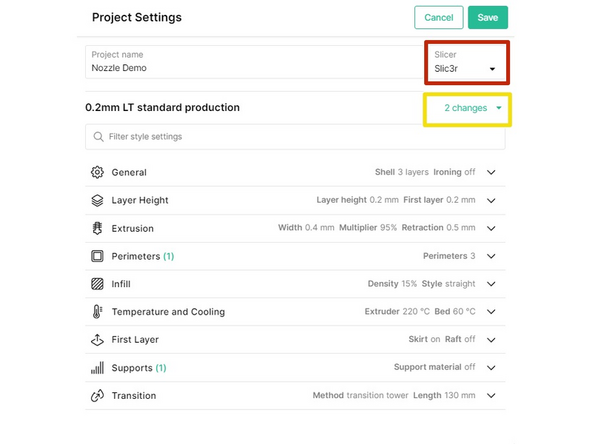
Open the Project Settings to adjust slicer settings.
-
You may select between the Kisslicer and Slic3r/PrusaSlicer engines.
-
As you tune and improve the printer profile, changes made here can be saved to an existing style profile, or a new style profile can be created.
-
-
-
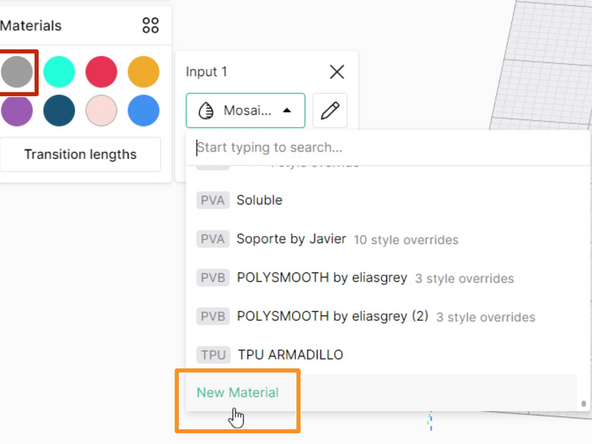
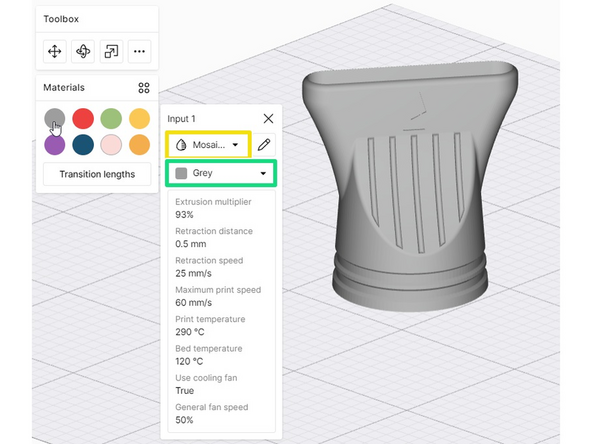
Start by selecting the color swatch under Materials, that will be used to color and visualize the part. Drag and drop this circular color swatch from the Materials panel over the STL or the file name in the Objects panel.
-
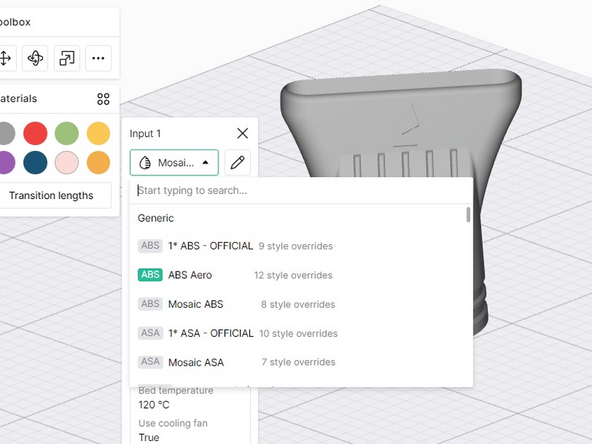
If you have not already created a material profile, you may create a new one by scrolling to the bottom of the Materials dropdown. Learn more on creating and managing material profiles here.
-
Next, select the material profile for that color swatch (e.g. PLA).
-
Green tags on material profiles indicate that they are a Mosaic material.
-
Lastly, select the filament color you would like to use for this material profile.
-
Third-party materials will allow for custom color selection.
-
The material profile and color selected here must match the material loaded to the Material Pod on Element/Array.
-
Third-party materials must use an NFC tag to be detected correctly by Element.
-
-
-
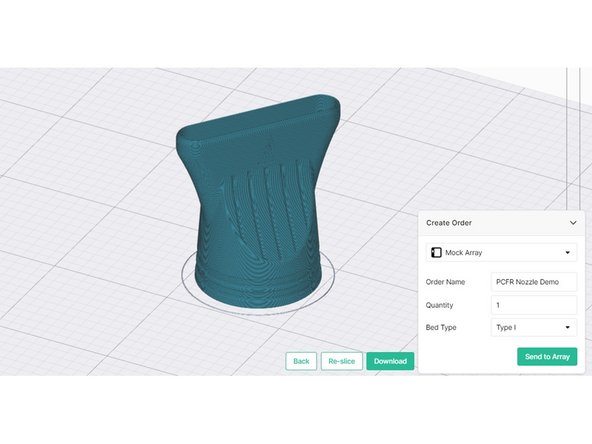
One slicing is complete, a preview of the part will be ready.
-
Use the print preview panel to view various toolpaths.
-
-
-
Enter a name for the order, the quantity (number of jobs or print runs that will be completed), and the bed type to be used.
-
When ready, click Send to Array.
-
-
-
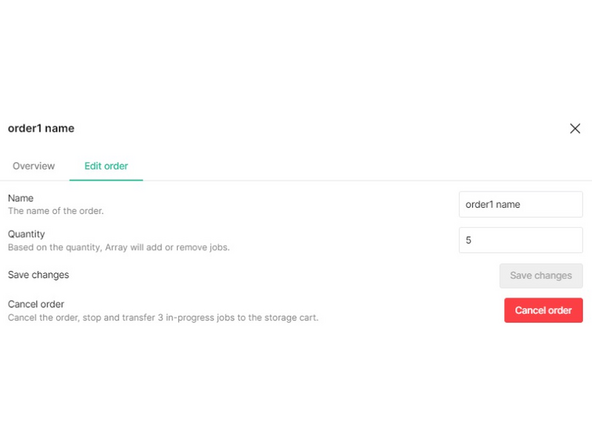
Modifying an Order in Canvas: By selecting the icon at the right side of an order in the Array queue, a window will open that provides options for modification. Specifically, the quantity can be changed and the order can be canceled. Changing the quantity (number of print jobs) will calculate an updated time remaining and cost for the order.
-
Canceling an order will stop any in-progress jobs and transfer them to the Storage Cart.
-
If you have any additional questions, please send us a message at support@mosaicmfg.com
If you have any additional questions, please send us a message at support@mosaicmfg.com


