Introduction
In this guide you will learn how to:
- Connect Array to the Internet
- Connect Array to a Canvas account
- What controls are possible via the Array device view
- How to view queue and print history
- Perform troubleshooting for Internet and Canvas connections
-
-
Array connects to the Internet by Ethernet.
-
Check the status of the connection by going to the Settings > Network.
-
-
-
Go to Settings > Canvas to generate an activation code.
-
Visit canvas3d.io/devices and click Connect Device to enter the activation code.
-
-
-
Visit the Devices menu and double-click on the linked Element printer to view its status and controls.
-
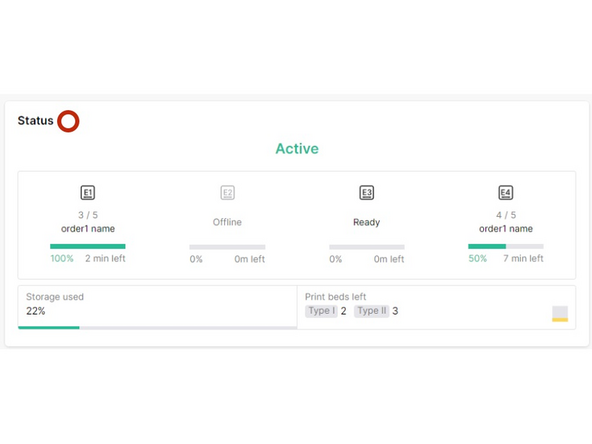
Status: Indicates the overall status of the Array system, Element printers, storage usage, and number of print beds remaining in the storage cart.
-
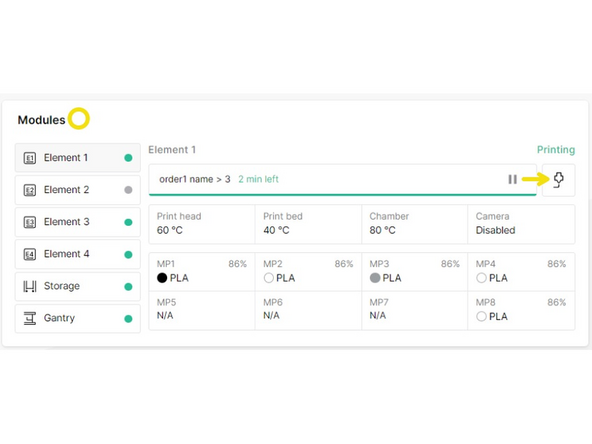
Modules: Provides more details for each Element printer, the storage and gantry systems. Access printer controls for each Element printer, and options to deactivate Element.
-
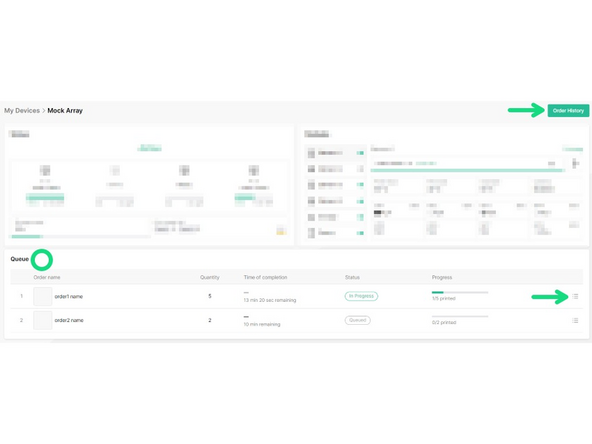
Queue and order history: View progress for ongoing and upcoming orders. Options for editing jobs in an order. Order history to view previous print runs (Learn more).
-
If you have any additional questions, please send us a message at support@mosaicmfg.com
If you have any additional questions, please send us a message at support@mosaicmfg.com


