-
-
Continue through the guide for detailed steps
-
-
-
Home the print bed under Controls > Printer. Turn Element off using the switch at the back of the printer
-
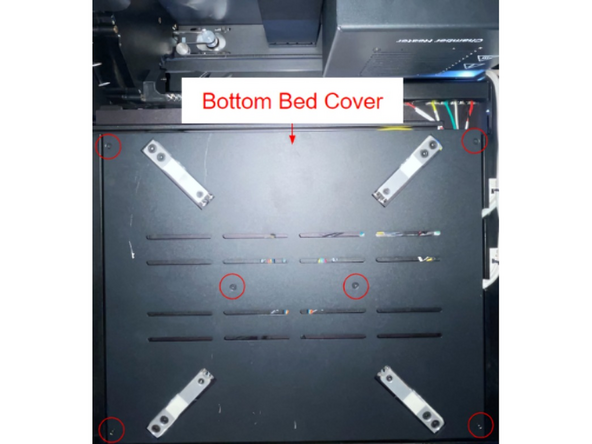
Using a 2mm Hex/Allan tool, remove 6 x M3 flatheads from the bottom cover, as highlighted in the image
-
Use the flashlight provided in the Snap Disc kit as a light source
-
-
-
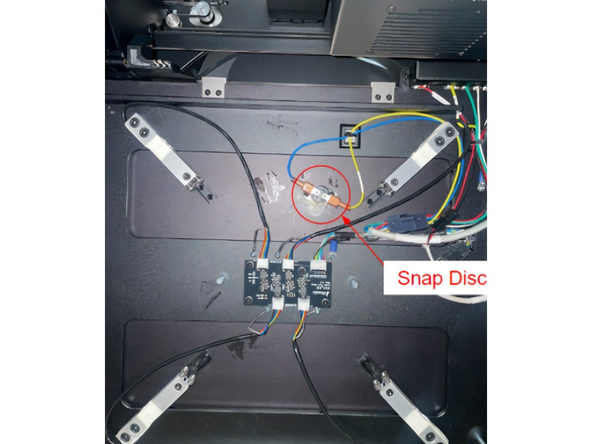
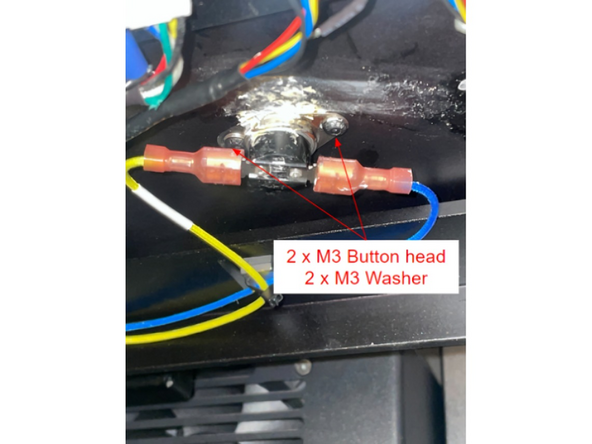
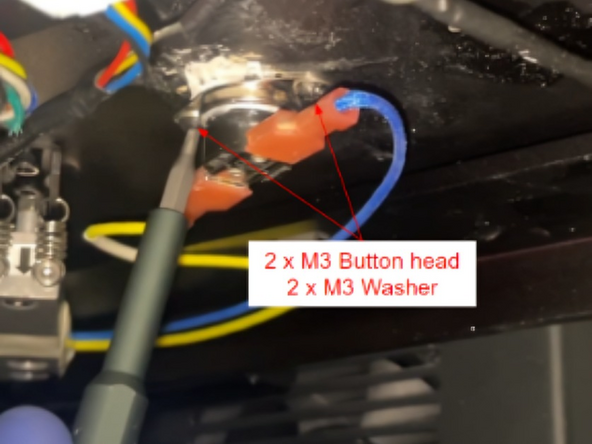
Remove 2 x M3 button heads and 2 x M3 washers that are used to install the Snap Disc
-
-
-
Wear disposable gloves provided in Snap Disc kit to avoid contact with thermal paste. May cause mild irritation to skin.
-
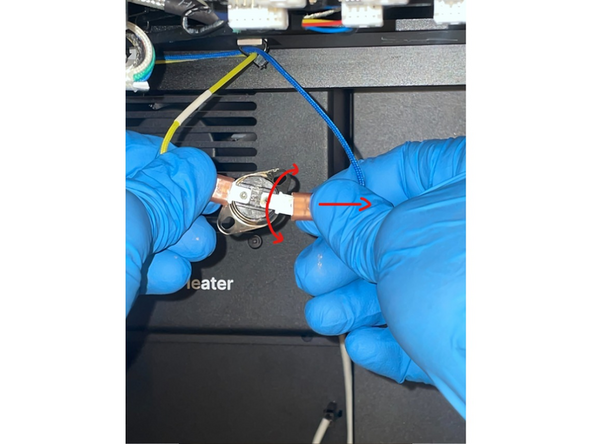
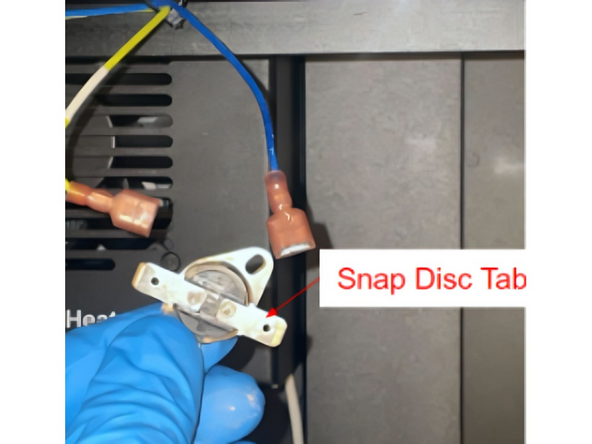
Remove one connector from the Snap Disc by lightly shifting the connector up and down while tugging away from the Snap Disc
-
Repeat for the second cable connector
-
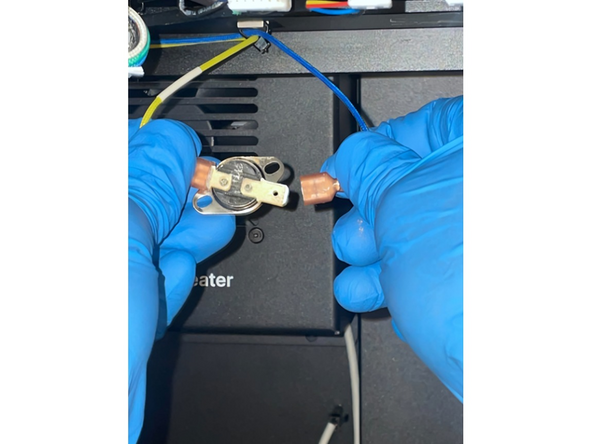
Let both cables dangle and set aside Snap Disc
-
-
-
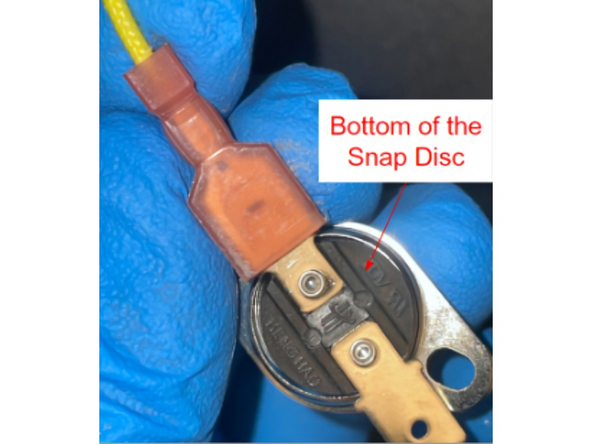
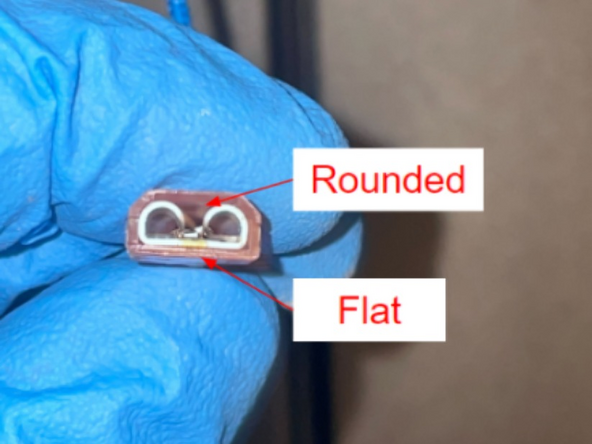
Insert one connector onto the new Snap Disc tab, ensuring the flat side is facing the bottom of the Snap Disc
-
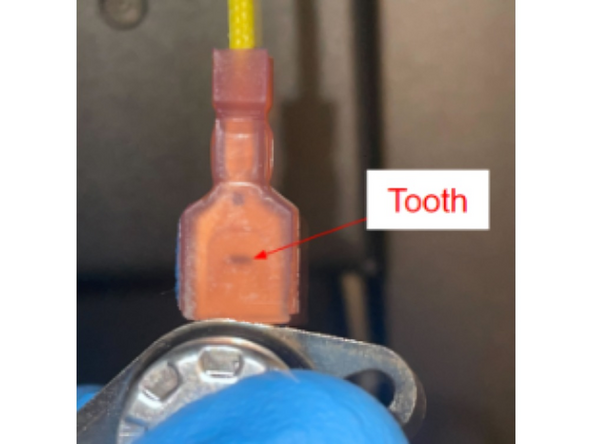
The Snap Disc connector has a tooth which mechanically snaps into the hole on the Snap Disc tab
-
Repeat for the other connector
-
-
-
The tooth on the connector should "snap" into place in the hole on the Snap Disc tab
-
Tug lightly on the cable, the connection should remain intact
-
-
-
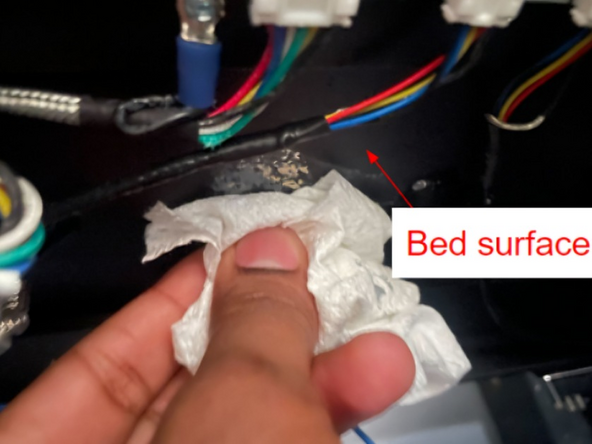
Use the alcohol swab provided in the Snap Disc kit to clean the old thermal paste from the bed surface
-
Add thermal paste to the newly connected Snap Disc
-
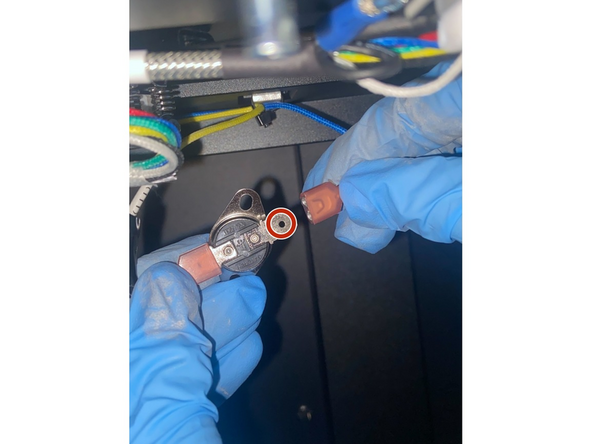
Thermal paste should cover the red ring as indicated
-
-
-
Fasten the Snap Disc back into its original position using the 2 x M3 buttonheads and 2 x M3 washers
-
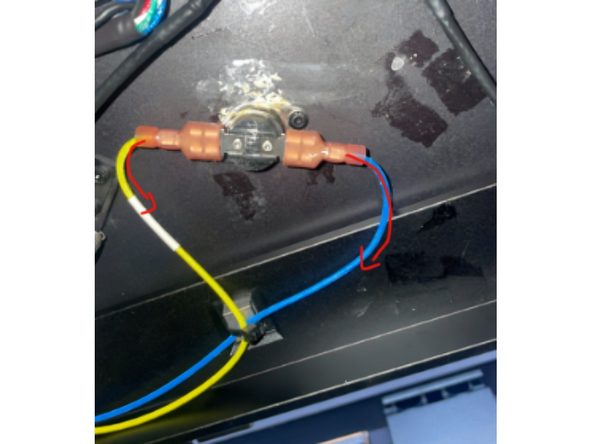
Validate that the cable path is the same as indicated with the red arrows
-
-
-
Align the bottom cover as seen in the image
-
Install 6 x M3 flathead bolts to the bottom bed cover
-
-
-
Power Element on, and go to Controls > Temperature
-
Set Bed to 120C and Chamber to 80C. Wait for printer to get up to set temperature - this may take up to 90 minutes
-
Allow the printer to remain at the set temperature for another 90 minutes
-
Turn off the Bed and Chamber temperature. If the printer begins to cool down, the installation was successful
-
Cancel: I did not complete this guide.
2 other people completed this guide.


