
Introduction
You can register a new Canvas account for free, or login to your existing account to complete the steps below.
In this guide you will learn how to:
- Activate and connect Palette 3 in Canvas.
- Create a new printer profile and setup.
- Selecting Palette for the project and slicing for multi-material.
- Send print files to Palette 3.
For a first print, you can download a calibration keychain here.
-
-
Completing this step will allow for print files to be sent directly from Canvas to Palette 3 (Pro).
-
Connect Palette 3 (Pro) to the Internet following the steps here.
-
On Palette 3's menu, tap the Canvas connection icon from the sidebar menu, and then on Log in to Canvas. This will provide you with an activation code.
-
On another computer, login to your Canvas account, and use the activation code to connect Palette 3 (Pro) and Canvas. Visit canvas3d.io/connect to enter the activation code.
-
Go to canvas3d.io/devices to view your Palette 3 (Pro).
-
-
-
Start a new printer profile by either: a) creating a blank profile using these steps here and inputting settings, b) using a printer preset, or c) importing a profile from Simplify3D, Slic3r/PrusaSlicer, or KISSlicer.
-
If you have a custom start and end sequence for your printer, please enter it in the Sequences page.
-
-
-
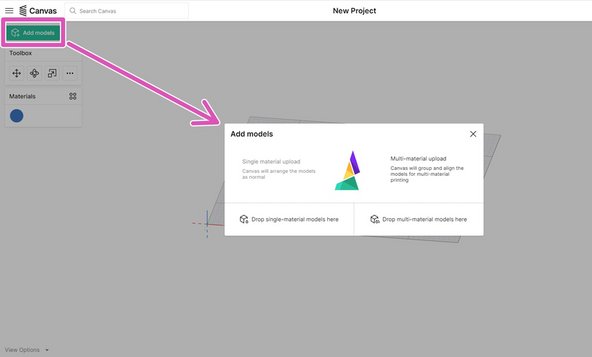
Create a new Project.
-
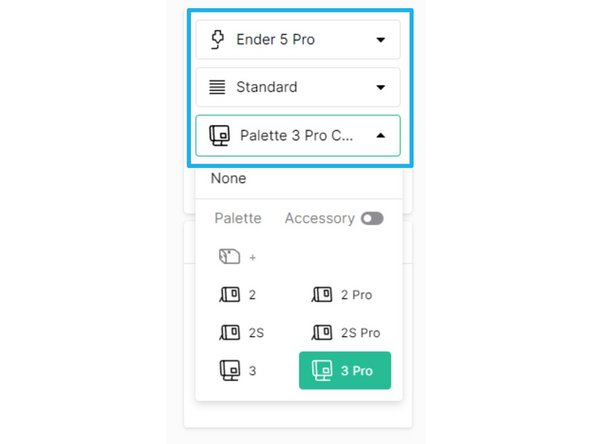
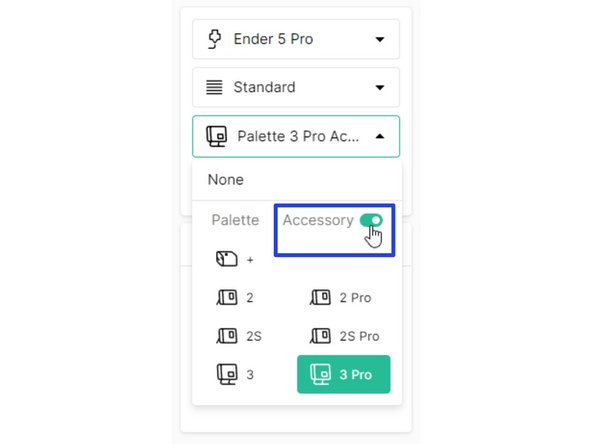
Select the printer profile and Palette model to be used for this project. By selecting a Palette model here, it will be set to connected mode by default.
-
Use the toggle to enable accessory mode for Palette.
-
Connected mode utilizes a USB cable between Palette and the printer, while there is no connection in accessory mode.
-
From the project view, click on Add models. Upload the STL files you would like to print.
-
If the model uploaded is only one STL, upload it as a single-color model. If the model has multiple STL files, upload as a multi-color model.
-
You can download this quick keychain test print.
-
-
-
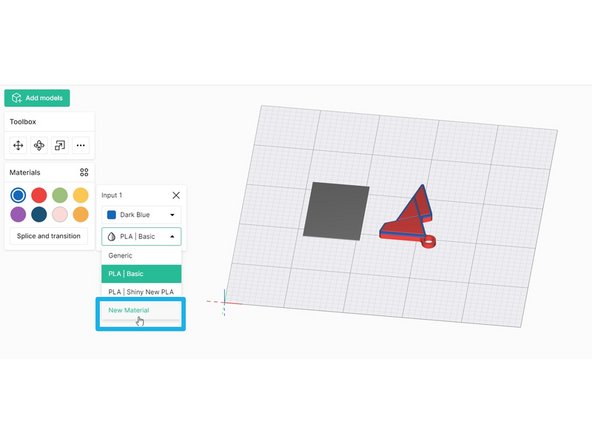
Material profiles are used for saving splice tuning settings, or using with style overrides. Material profiles are assigned to the color swatches in Canvas, which correspond with an input on Palette.
-
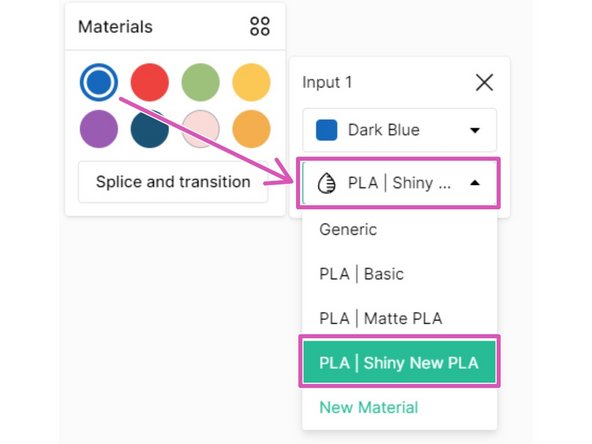
Create a new material profile, by first clicking on a color swatch, and then selecting Add New Material. Enter the name for the material profile (e.g. filament manufacturer/brand) and save.
-
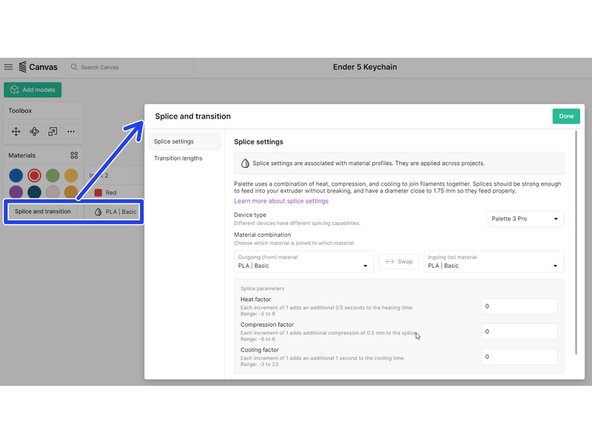
If you are looking to add splice tuning settings to the material profile, select the custom profile and click Splice & Transition. You’ll be able to select the newly created material profile, and enter the splice tuning values in this window.
-
Default splice tuning settings will be 0,0,0. Please perform splice tuning if these settings lead to issues such as broken filament or jams during printing.
-
When returning to the project, under Materials, click on a color swatch to check that the custom material profile is selected for each input that will be used in the print.
-
-
-
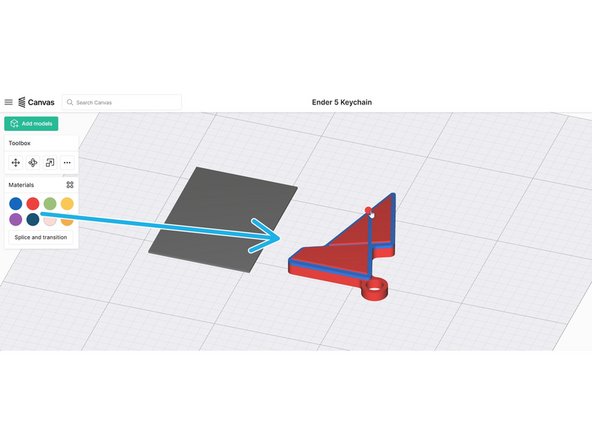
If multiple STL files are uploaded, color the model by dragging and dropping the color swatch over the model itself.
-
The color swatches in the toolbox correspond to the inputs on Palette.
-
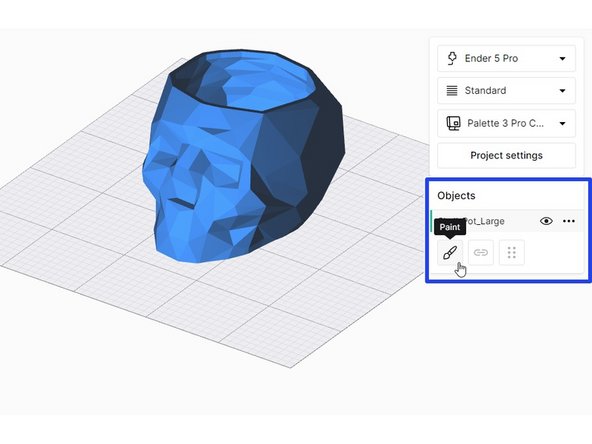
If only one STL is uploaded, the model can be customized with painting. To paint a model, select the STL in the object browser and then 'Paint.'
-
If you are printing the test keychain, please click and drag the colors and do not paint the model.
-
When a project utilizes more than one color, a transition tower will generate next to the part. The transition tower is an object used for purging filament in order to get clean color transitions, and is used for calibration in accessory mode.
-
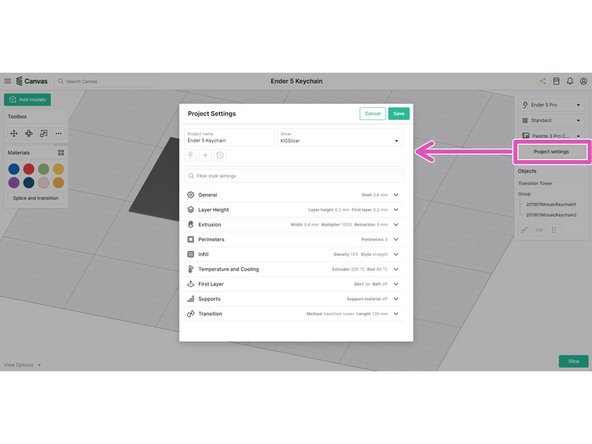
Once you're happy with the colors used on the models, click on Project Settings to review your slicer settings for the print.
-
For the first print, check for settings such as extrusion width, extrusion multiplier, layer height, and z-offset.
-
Under transition settings, you will find the transition length. The transition length determines how much filament to extrude on the tower, in order to clean the nozzle of the old color and then prime the next color. To learn more about optimizing transition lengths, see variable transitions.
-
-
-
Once your model's colors are assigned, and your slicer settings are saved, slice the project.
-
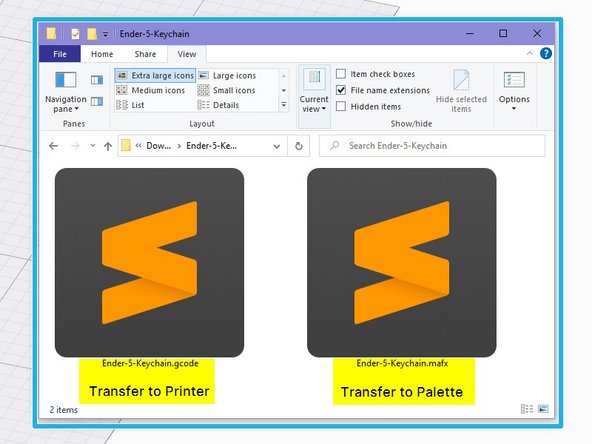
If Palette 3 is selected in accessory mode, you will have two files available for download: a .mafx for Palette 3's USB drive, and .gcode file for the printer.
-
If Palette 3 is selected in connected mode, one file will be available to send to Palette 3 directly, or can be downloaded: a .mcfx for both Palette 3 and the printer.
-
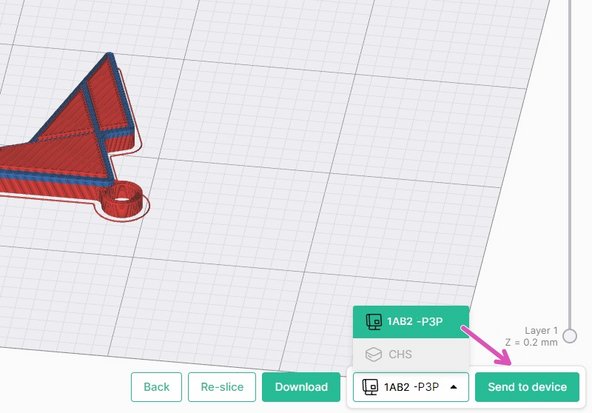
After slicing, there will be an option available to send to an online/linked Palette 3 (Pro).
-
-
-
If you are printing with accessory mode, please continue to the accessory mode guide.
-
If you are printing in connected mode, please continue to the connected mode guide.
-


If you have any questions, please don't hesitate to contact us at support@mosaicmfg.com.
If you have any questions, please don't hesitate to contact us at support@mosaicmfg.com.
Cancel: I did not complete this guide.
14 other people completed this guide.
