
Introduction
If you are building your own Canvas Hub, you'll be able to connect your printer and Palette via OctoPrint to control, load, and start your print files. The following steps will walk you through how to install the necessary plugins if you already have a Raspberry Pi with OctoPrint and would like to create your own Canvas Hub.
This setup guide is intended for users with an existing OctoPi and connected to your printer. If you do not have OctoPrint setup we would advise that you visit https://octoprint.org/ to setup your own OctoPrint server and then continue with this guide.
If you choose to use our free OctoPrint Canvas plugin you will have the same abilities as Canvas Hub users to control, load and start prints with your Palette 2 (Pro) (S) and printer.
-
-
To launch Octoprint, enter octopi.local, or copy and paste the IP address for the Raspberry Pi into the web browser.
-
Our plugins are compatible with Octoprint 1.7.3 and previous releases.
-
-
-
Once updated, select the Settings icon.
-
Once in the Settings window, select Plugin Manager. Scroll to the bottom of the page and select Get More....
-
You'll enter the Install new Plugins... screen. From here, you'll be able to install a plugin from URL.
-
-
-
Copy and paste the following file destinations URLs in the following order. Note: These plugins will need to be installed individually to be successful.
-
Palette 2 plugin file destination URL: https://gitlab.com/mosaic-mfg/palette-2-...
-
Canvas plugin file destination URL: https://gitlab.com/mosaic-mfg/canvas-plu...
-
Do not directly download and unzip the files. The plugins will only work when installed from URL in OctoPrint.
-
Please also note that if you have any existing GCode scripts on your OctoPrint, this may affect certain Canvas Plugin and P2 Plugin functionalities, such as filament loading. Please consider reviewing/removing conflicting scripts if certain functionalities are not acting as they should.
-
-
-
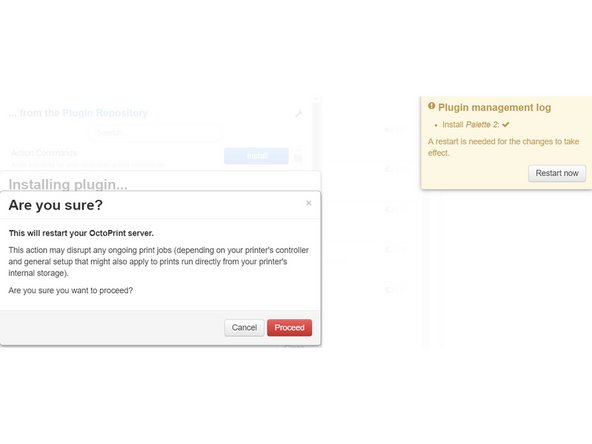
Once completed, you'll be prompted to restart your OctoPrint server. Proceed with the restart.
-
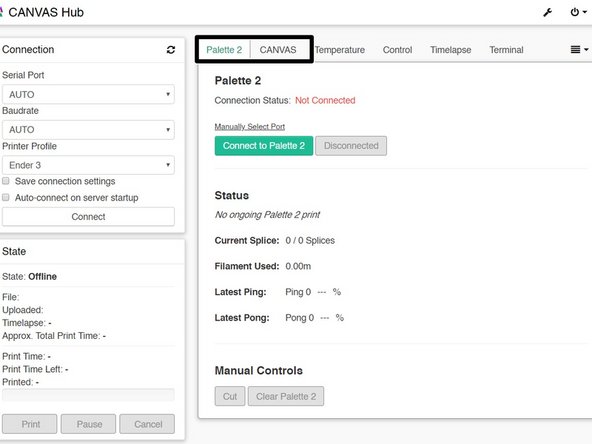
Once the server has been restarted, the interface will now be updated to the Canvas Hub interface. You should see two additional tabs: Canvas and Palette 2.
-
-
-
To allow uploading of your sliced files directly from Canvas, you will need to first connect your account to Canvas Hub. In Octoprint, go to the Canvas tab and click "Get activation code".
-
Visit canvas3d.io/connect to enter the activation code and link your Canvas account to Octoprint.
-
If the link is successful, you will see your username in the Linked Accounts section, and Connection Status will change to Connected. This will allow you to send prints directly from Canvas after slicing to Canvas Hub.
-
Once you're ready to connect your Palette 2, click on the dropdown menu next to the Canvas tab to select Palette 2. Connect your printer by selecting Connect from the 'Connection' box. Please ensure your Palette 2 is plugged in, turned on and connected to one of your Raspberry pi ports.
-
-
-
If you would ever like to switch back to the old OctoPrint interface, open the Settings menu, select Canvas under 'Plugins', and uncheck the 'Display Canvas Theme' option.
-
-
-
You're now ready to use your Canvas Hub and Printer! Please proceed to this support article to print with your Canvas Hub, Palette 2 (S) (Pro), and printer.
-


If you have any additional questions, please send us a message at support@mosaicmfg.com.
If you have any additional questions, please send us a message at support@mosaicmfg.com.
Cancel: I did not complete this guide.
16 other people completed this guide.
