Introduction
This guide shows how to use our Material Tags with 3rd party materials.
Our Material tags allow Element and Array to read and retain information about a 3rd party spool, even if it is removed from a Material Pod and reloaded later. This helps to make the experience of printing with Element and Array more efficient and reliable.
-
-
Most 3rd party spools that fall within these dimensions, and contain a compatible material, will be suitable for use with Material Pods and 3rd Party Material Tags
-
Learn more about 3rd party material compatibility here
-
-
-
The Application Tool comes with each pack of 3rd Party Material Tags. If you've lost or damaged your tool, contact us at support@mosaicmfg.com
-
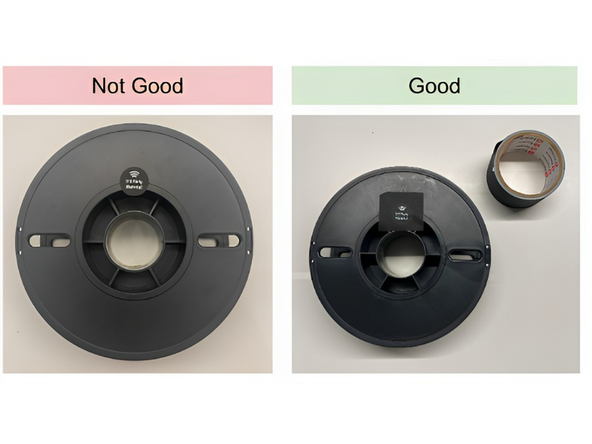
To apply Material tags, follow the instructions on the tool, placing the tag in the tag placement hole on a flat section of the spool. It's important to place the tag on a clean and flat surface, so that it will stick reliably and not take damage
-
Please note that tags are delicate and can be damaged by bending them or pressing them over sharp geometry. Tags are not designed for removal and re-use
-
-
-
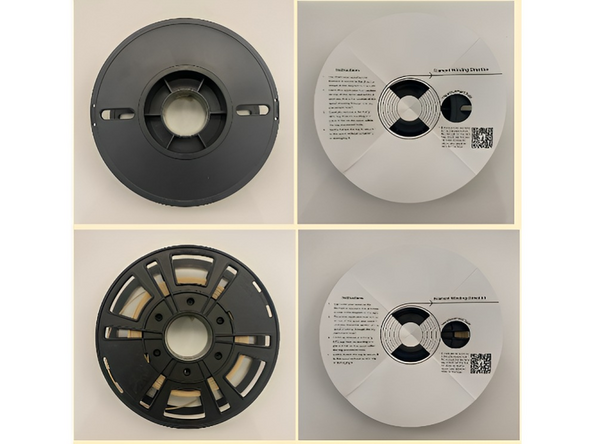
Some 3rd party spools will not have any flat sections that fit within the tag placement hole. Some examples of how that may look are shown
-
In some cases, the Material tag can still adhere to a rough surface and be readable. In other cases, too much bending of the tag or overhanging off the spool will cause the tag to become damaged and unreadable
-
-
-
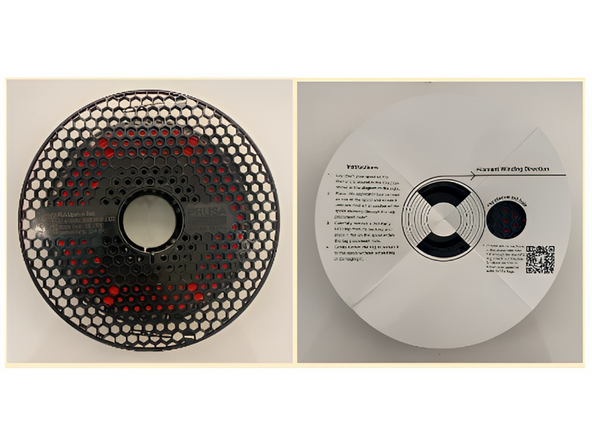
With a rough or non-flat surface, you can ensure the tag will be readable by flattening the application area as much as possible with tape, before adhering the tag to the spool
-
Cover the desired area with a few layers of tape, enough to reduce ridges and eliminate overhanging of the tag
-
Some examples of this method are shown
-
-
-
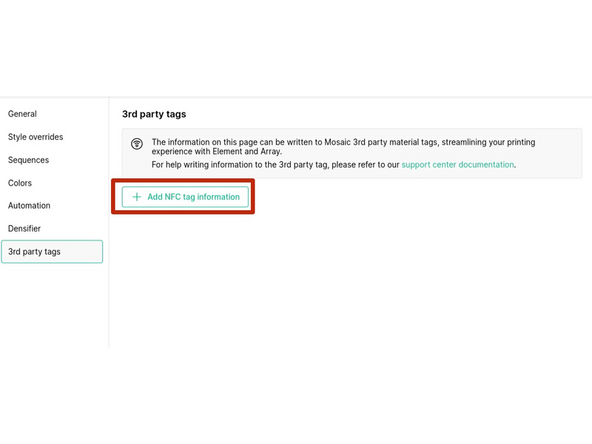
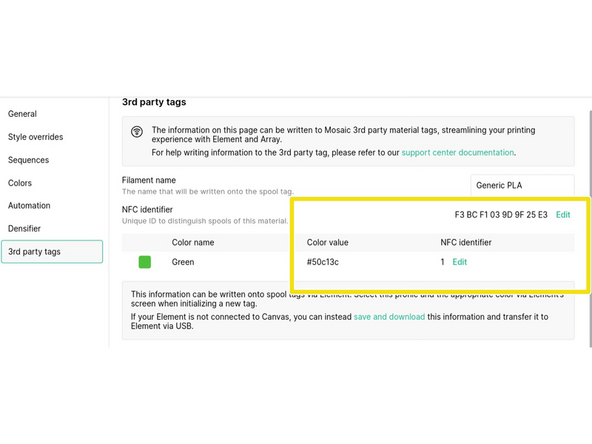
Create a Material Profile for your material, or use an existing profile. Add the colors you're using in the Colors tab of your profile
-
In the 3rd party tags tab, click + Add NFC Tag Information
-
A unique NFC identifier will be generated, along with color value codes for all colors. If your Element is not linked to Canvas, save and download the tag information now
-
-
-
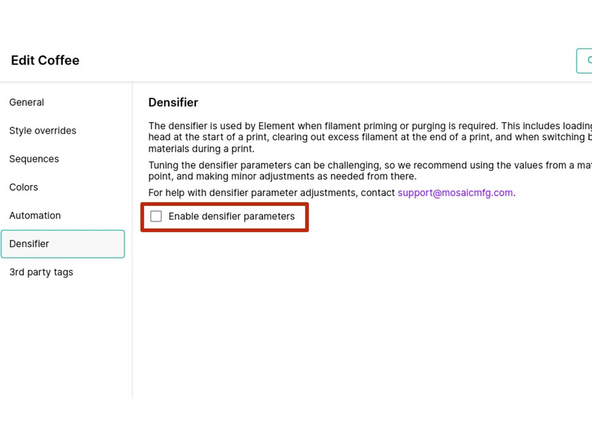
Element requires densifier parameters in order to successfully purge filament. Go to the Densifier tab, and check Enable densifier parameters
-
Parameters that are tuned for Mosaic Materials will automatically be applied. In many cases, particularly with PLA, these parameters should be applicable across all 3rd party materials
-
With non-PLA 3rd party materials you may need to tune the parameters in order to ensure success. A full Canvas workflow for this is coming soon - for now, please contact your Account Manager or support@mosaicmfg.com for help with this
-
-
-
Insert the spool with the NFC tag into a Material Pod and install in Element. You can use the wheel lock provided with each Material Pod to secure the spool in place
-
Do not over-tighten the wheel lock on the spool. It only needs to prevent the spool from wobbling, not clamp the spool in place.
-
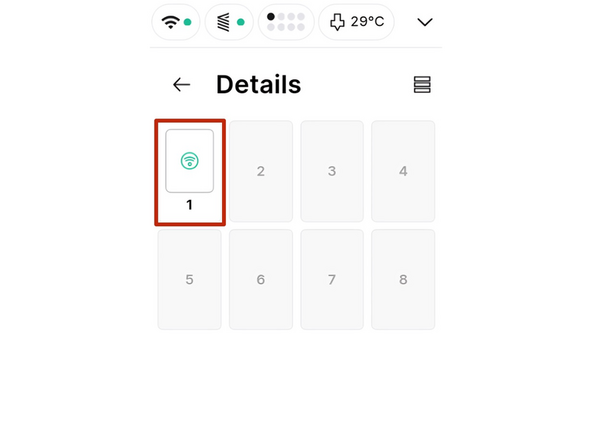
On Element's screen, navigate to Materials > Details, and click on the unidentified tag
-
If using Array, deactivate the Element you're using before writing the tag
-
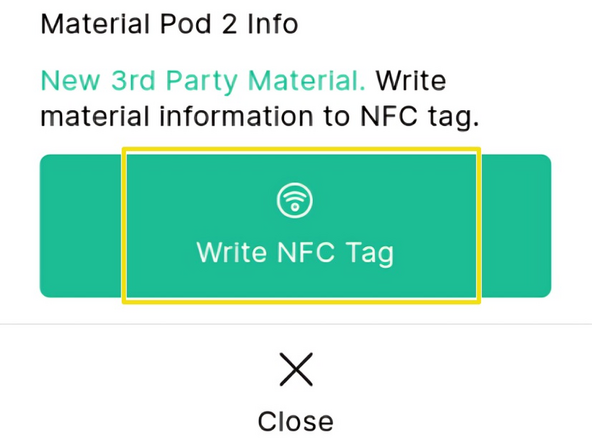
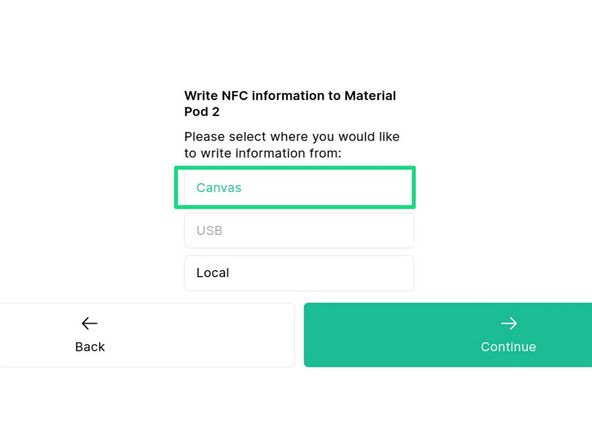
Select Write NFC Tag
-
If your Element is linked to Canvas, choose the Canvas option. If you're working offline, upload the tag information you saved previously from USB
-
Click through the workflow to write the Tag. You should then be ready to start printing!
-


If you're still having trouble adhering the Material tags, or you're unsure if your 3rd party spools will be compatible with Material Pods - contact us at support@mosaicmfg.com
Interested in Materials that will be guaranteed to work seamlessly with Element and Array? Check out our Mosaic Materials
If you're still having trouble adhering the Material tags, or you're unsure if your 3rd party spools will be compatible with Material Pods - contact us at support@mosaicmfg.com
Interested in Materials that will be guaranteed to work seamlessly with Element and Array? Check out our Mosaic Materials
Cancel: I did not complete this guide.
2 other people completed this guide.