Introduction
This article assumes that you have already attempted to update the firmware using the Firmware Updater and your unit's screen does not power on or you are getting a "handshake" error. If you have not done so already, please follow the steps in this support article before proceeding with the step below.
-
-
For this step, you'll first need a jumper if you are using a non-S unit. If you do not have one, please contact us at support@mosaicmfg.com and we can mail one to you.
-
If you have an S unit, please follow the instructions here.
-
-
-
Turn Palette 2 off and remove the top lid by gently lifting from the sides.
-
Remove the acrylic ingoing cover by loosening the five thumbscrews counterclockwise.
-
Remove the 4 screws holding the bottom casing to the substructure. Two are located at the top two corners of Palette 2 while the other two are under the ingoing cover.
-
-
-
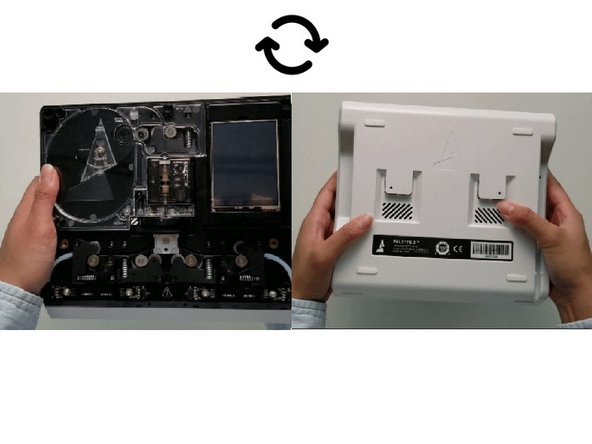
Once the screws are removed, grip Palette 2 together by the substructure and bottom casing together and flip so that the screen is facing down.
-
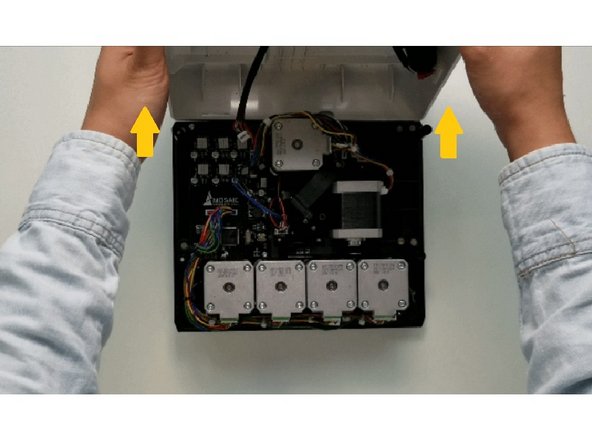
The substructure is connected to the bottom casing by a bundle of wires. Slowly and carefully lift the casing from the bottom up while ensuring that the wire bundle is not pulled abruptly.
-
Please note: remove the SD card before completing this step as damage may be caused to your unit if left in.
-
-
-
The main board is located at the top left corner of the substructure. Unplug the three remaining wires on the board. It's fine if you forget the order of the plugs as each plug is unique and will only attach to the board in one orientation.
-
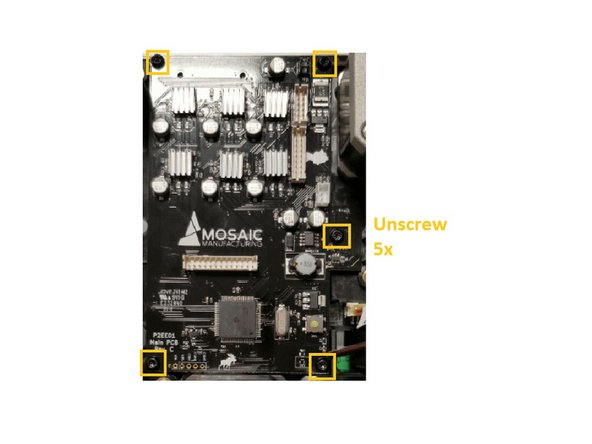
Remove the 5 screws holding the main board.
-
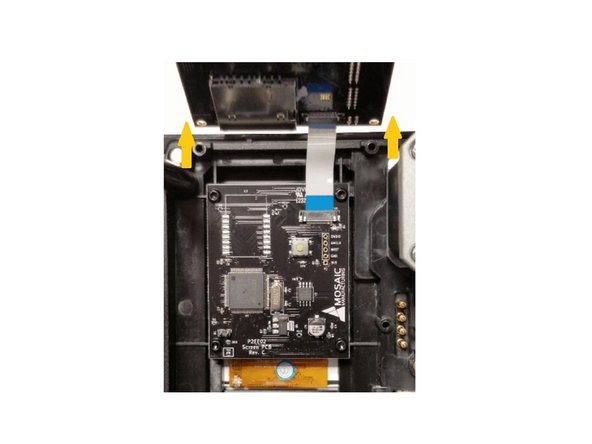
Gently lift main board to reveal a ribbon cable attached to the Screen PCB.
-
-
-
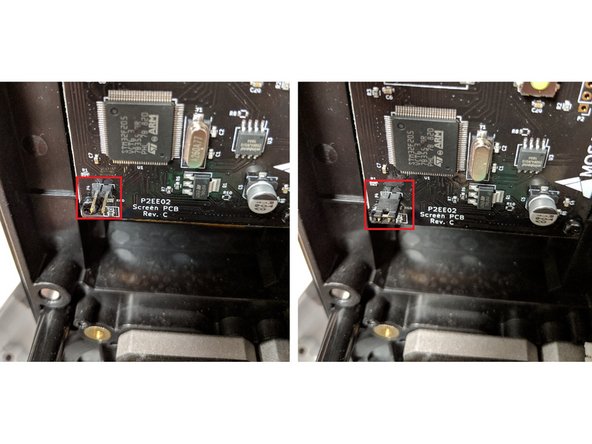
On the Screen PCB, you'll need to 'jump' your board. Use the jumper on the highlighted pins. The left picture shows the pins without the jumper, and the right photo shows how the jumper should be positioned on the pins.
-
Make sure the I/O tether is plugged into the Main Board (this bundle of wires connects the bottom casing to the Main Board when you first open the back casing), and that the blue ribbon cable connecting the Main Board to the Screen Board is fully connected.
-
With just the power plug inserted, power on your unit. You should see a red light appear on the Screen PCB. Once this appears, re-attach the USB plug and re-open the Firmware Updater.
-
-
-
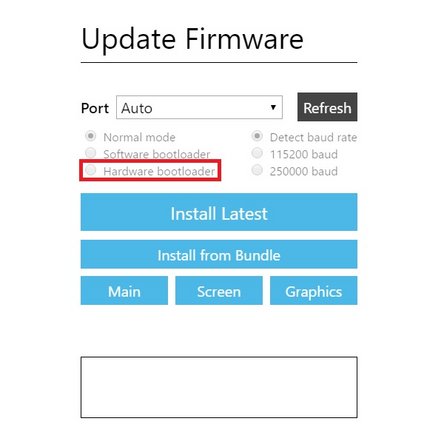
The jumper should remain on the screen board for this step. Return to the Advanced Options page and ensure that the port is selected properly (not Auto) and that 'Hardware bootloader" is selected. Click Screen and upload the file 'P2EE02.bin' from the zip file (Firmware version 9.2.9)
-
The progress bar should now appear. Once uploaded successfully, you will need to remove the jumper. Please power cycle Palette by powering it off then on. Proceed to the next step to install the Main and Graphic firmware.
-
-
-
Return to Advanced Options, select 'Hardware Bootloader' and ensure the proper port is selected. Select Main and upload file 'P2EE01.bin from the unzip file.
-
Once this is uploaded, return to Advanced Options and select the proper port, and 'Hardware Bootloader'. Once done, select Graphics and upload the file 'ui.min' from the zip file.
-
You're all updated! You can now re-assemble Palette.
-
If you have any additional questions, please contact us at support@mosaicmfg.com.
If you have any additional questions, please contact us at support@mosaicmfg.com.
Cancel: I did not complete this guide.
4 other people completed this guide.


