Introduction
Print Beds are constructed with a flexible piece of coated metal. Print Beds are split into different types where each has a recommended set of Mosaic materials. For some materials, additional preparation is needed for the Print Bed.
The Print Beds are flexible to help detach prints.
With time and use, Print Beds may wear out or warp. Prints may no longer have good adhesion or if warped will not fit into the Storage Cart or printers. In these cases, we recommend replacing the Print Beds.
Please see Material Printing Guides for Mosaic Materials and their recommended settings .
Tools
Parts
No parts specified.
-
-
First ensure that you have the correct bed type for your print. The label on the front-right side of the Print Bed shows which type it is. This label also provides a unique serial number to help identify a specific bed.
-
Type II beds are compatible with PEEK and PEKK filaments. Type I beds are compatible with all other filaments.
-
-
-
Lift the Print Bed and rest its back end against the end stops at the back of the bed area.
-
Align the sides and lower the Print Bed into position. It will be gripped magnetically.
-
-
-
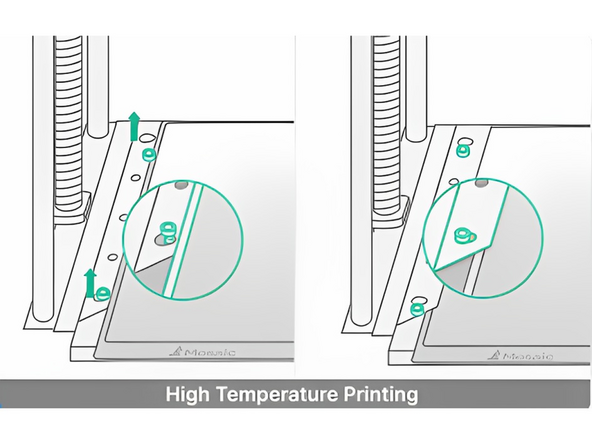
When printing with Type II beds for high temperature printing, move the skis inwards to hold the bed in position and prevent warping: use a 2.5mm Hex/Allen key to loosen the bolts slightly, and push the skis inwards, then tighten the bolts again.
-
When printing with Type I beds, ensure that the bed is not sitting on top of the skis
-
Before removing the bed, move the skis outwards again.
-
If you have any questions, please don't hesitate to contact us at support@mosaicmfg.com.
If you have any questions, please don't hesitate to contact us at support@mosaicmfg.com.
Cancel: I did not complete this guide.
2 other people completed this guide.


