
Introduction
The following instructions will help you set up Palette with your printer for the first time for Bowden, Direct Drive, or Delta printers.
-
-
Palette can rest upright by using the stand. The stand slides into the mounting tabs on the back of Palette 2.
-
Palette can be mounted onto printers or other surfaces using the mounting bracket.
-
Note: Palette is heavy; please use appropriate hardware (not included).
-
Palette has rubber pads on its back for grip and protection.
-
-
-
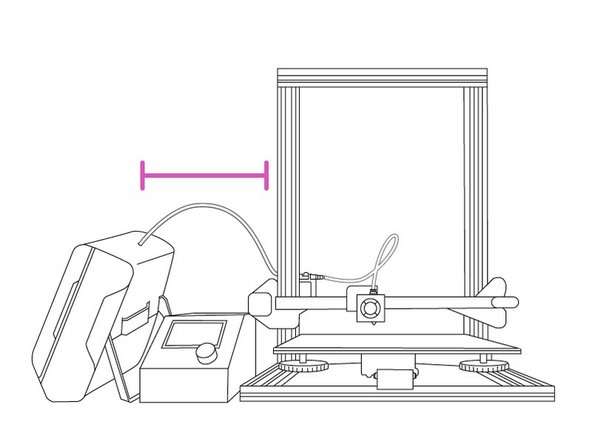
Select the outgoing tube for your printer. We want to ensure that when the Teflon tubing is attached to your printer’s extruder, it can travel to all corners of your print area without causing any sharp bends or curves for your filament.
-
For the majority of Direct Drive printers, the medium length of tubing (800 mm) allows for the extruder to move around the print area comfortably. There is also the large tube (1,100 mm, included in the Palette 2 Pro package) that is optimal for larger printers.
-
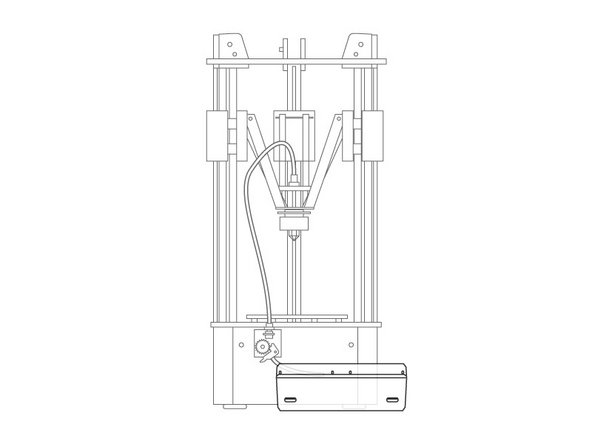
For Bowden printers, the small tube (500 mm) is long enough to feed filament into the filament feed. If you have a Palette 2 and would like a long tube, please contact our Support Team.
-
-
-
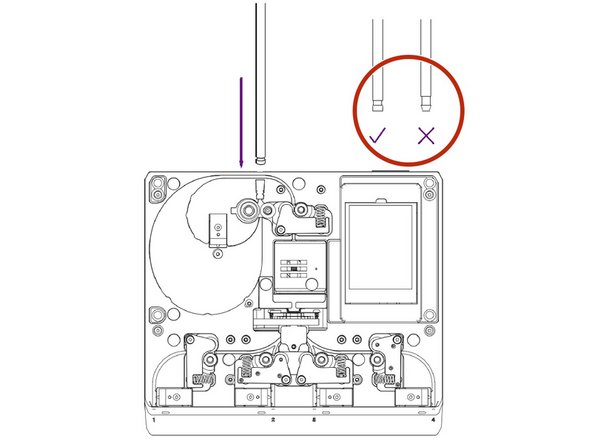
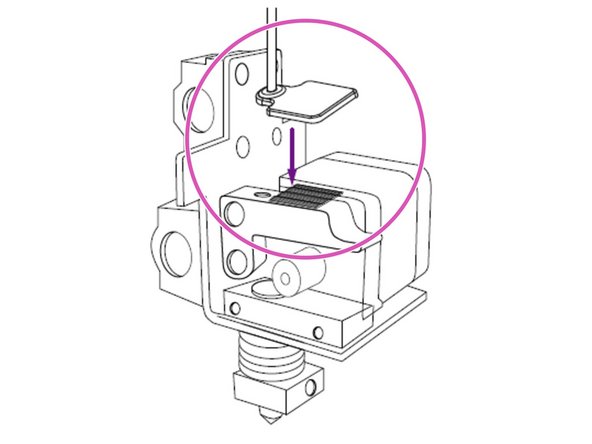
Once the appropriate tube is selected, you’ll notice that the two ends of the tubing have different ends: one is wider and cylindrical (‘funnel’ end) while the other becomes narrow and has a longer neck (‘tapered’ end).
-
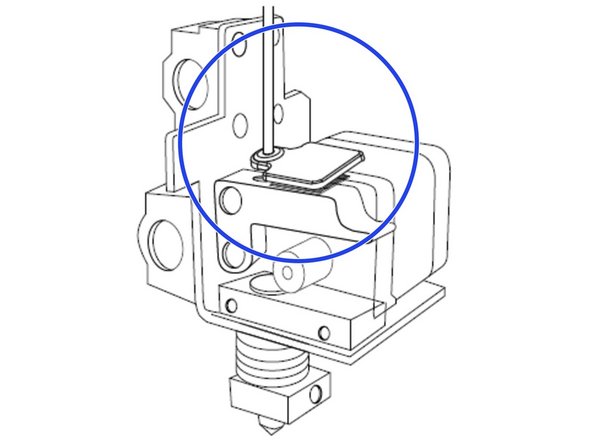
Insert the funnel end into Palette until you feel the tubing lock into place.
-
Insert the tapered end into the supplied Teflon tube clip.
-
-
-
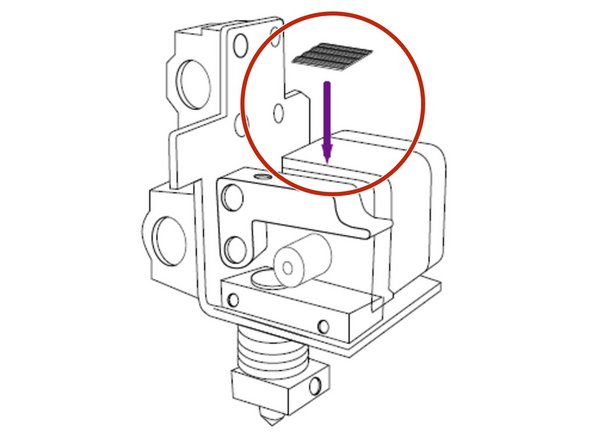
During prints, it’s important that the distance from Palette 2 to your printer’s extruder is kept at a constant distance in order to provide consistent calibration values. This is why the Palette 2 (Pro) package includes a version of the Teflon tube clip that fits with a majority of extruders.
-
This is secured to your extruder using provided Velcro squares - secure the Velcro square to next to your extruder’s filament input.
-
Place another square on your Teflon tube clip and press the Velcro together to secure the clip.
-
The outgoing tube should align with your extruder’s filament input.
-
If the provided Teflon tube clip is not optimal for your printer’s extruder, we have a variety of other Teflon tube clips found here: http://mm3d.co/guide-clip If you'd like to design your own clip, we've provided some instructions and tips here: http://mm3d.co/p2extruder-clip
-
-
-
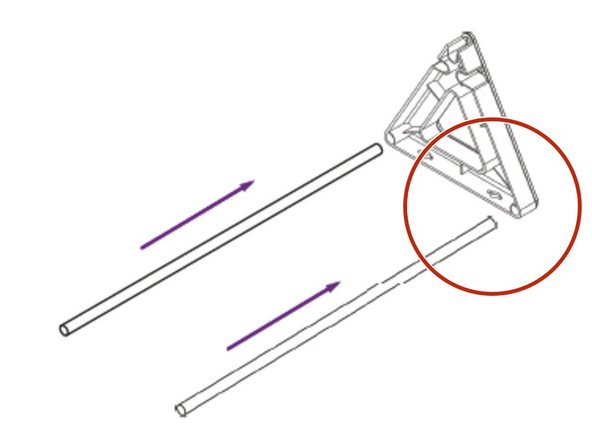
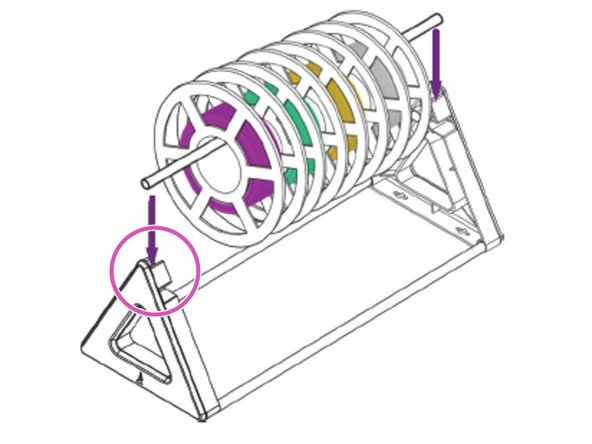
In order to easily feed filament into your Palette, we provide a spool holder that holds 4 spools and allows you to easily swap out different colors or materials.
-
Insert two filament rods into the holes at the base of the spool holder end.
-
Firmly press the ends together.
-
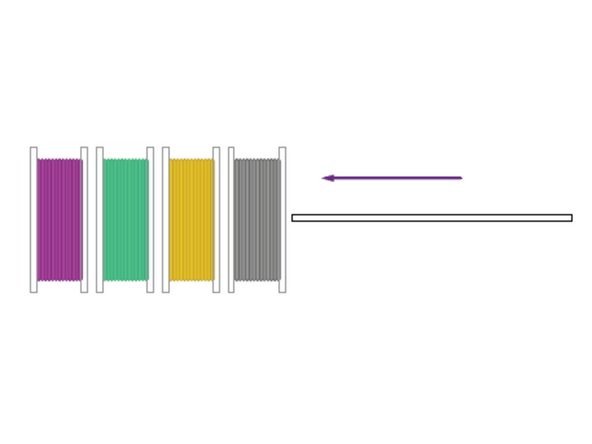
Place filaments spools on the third filament rod.
-
Lower the spooled filament rod into the notches at the top of the spool holder.
-
-
-
Slice a model for Palette printing:
-
-
-


If you have any additional questions, please send us a message at support@mosaicmfg.com.
If you have any additional questions, please send us a message at support@mosaicmfg.com.
Cancel: I did not complete this guide.
7 other people completed this guide.
