
Introduction
In this guide you will learn how to:
- Install the heater module inside an Element printer for high temperature printing
The heater module can remain installed when switching between LT and HT printheads.
Tools
Parts
No parts specified.
-
-
On the screen, navigate to Controls > Configurations > Chamber Module Settings. Start the Install Chamber Heater workflow
-
Lower the bed to the bottom of Element
-
Please do not put any weight/lean on the bed assembly
-
-
-
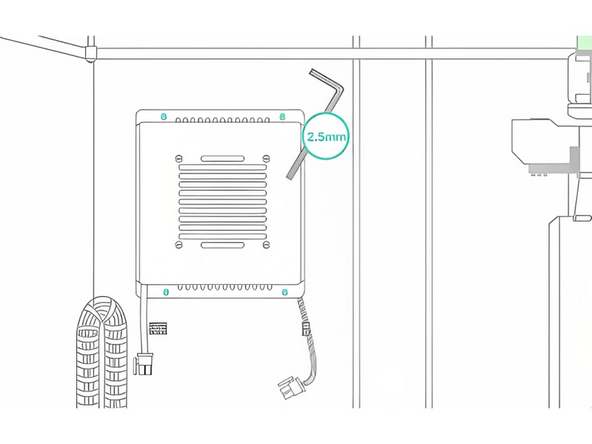
Loosen (but do not fully remove) the 4 bolts at the back of the chamber. Ensure the washers remain in place
-
-
-
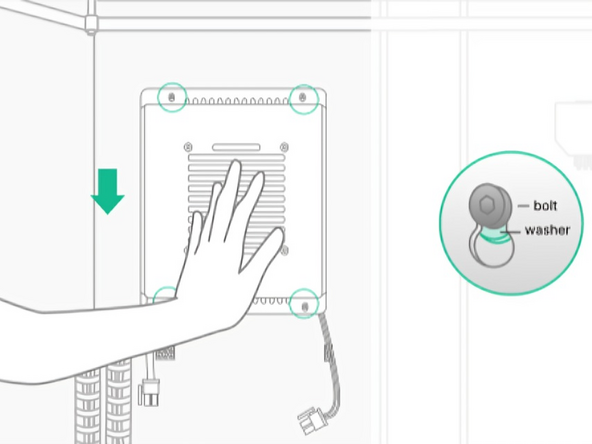
Position the heater's slots over the 4 bolts, and slide down to secure them in place, with the washers behind the heater
-
Ensure the washers positioned between the Chamber Heater sheet metal and the metal stand off on Element
-
If the Chamber Heater is difficult to install, and does not slide down into place, ensure the screws are loose enough
-
-
-
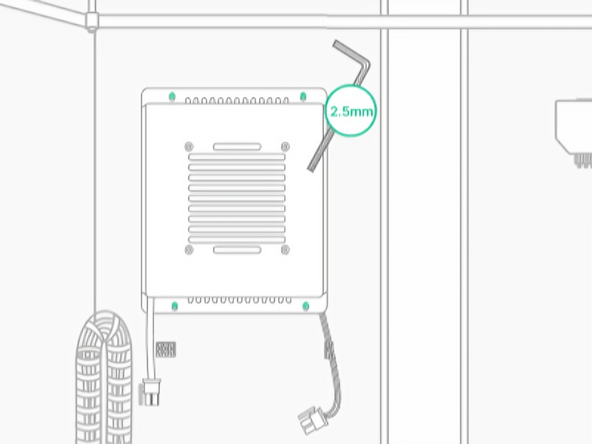
Tighten the 4 bolts using the 2.5mm Hex/Allan key
-
Avoid over-tightening these bolts
-
-
-
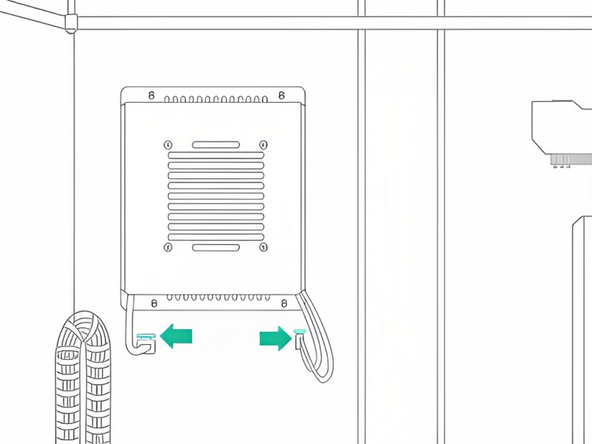
There is a cable on the left for the heater (6-pin connector) and one on the right for the fan (2-pin connector). Plug in each cable to their respective connector
-
The connectors will click properly when installed. The clip on the end of the cable will face upwards when inserted
-
-
-
To test that the chamber heater is properly installed, press 'Start Chamber Heater Test' at the end of the installation
-
Navigate to Controls > Configurations > Chamber Heating Settings and make sure that the Chamber Heater is displayed
-


If you have any additional questions, please send us a message at support@mosaicmfg.com
If you have any additional questions, please send us a message at support@mosaicmfg.com
Cancel: I did not complete this guide.
2 other people completed this guide.
