
Introduction
This guide encompasses steps to take before printing with Palette, running the first print on Palette 3, and how to further tune the printer profile. Each step here will provide a link to a more in-depth guide on how to complete each task.
In this guide you will learn:
- Items to check on your printer before setting up Palette
- How to setup Palette 3 in Canvas and slice for multi-material
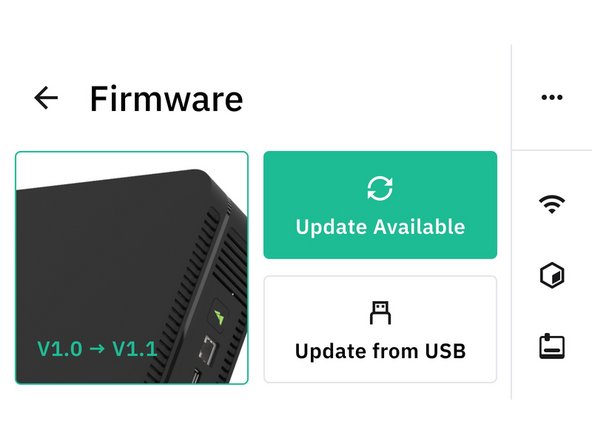
- Update Palette 3 firmware
- Palette 3 and printer setup
- Introduction to Splice Tuning for materials
- How to complete the first print in accessory or connected mode
- Further information on how calibration works and how to tune the printer profile
-
-
Please make sure your extruder is calibrated and your bed is levelled before adding Palette.
-
The printer's extrusion directly affects Palette's ability to maintain color and material calibration, which is why extruder calibration is important beforehand. Having a printer that is well tuned will work better with Palette.
-
First layer calibration or z-offset is also important for calibration early into the print. Having the nozzle too close to the bed will result in poor extrusion and lower pings.
-
-
-
Canvas is our multimaterial slicer designed for printing with Palette. With a Canvas account, you can:
-
Slice multi-color and multi-material prints, no file post-processing is required.
-
Use Kisslicer or Slic3r/Prusaslicer engines.
-
Send prints directly to a Palette 3 (Pro) that has been connected to WiFi.
-
Get started with Canvas by creating an account.
-
Link Palette 3 to Canvas following these steps.
-
Once you've connected your Palette to Canvas, your device will show up on the list under My online devices with your unit's serial number.
-
Get started with projects and slicing with Canvas following this guide.
-
-
-
-
When you turn on Palette for the first time it will guide you through the initial setup. Make sure that the following have been completed:
-
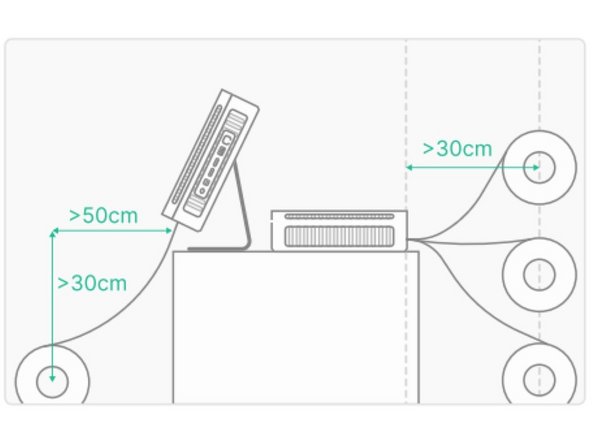
Palette is positioned close to your printer.
-
Palette is secure on its stand, custom mount, or a stable base/foundation.
-
PTFE is fastened into Palette 3 and the Teflon tube clip and can move freely around print area without causing any sharp bends in the filament path. You may also use a printable custom tube clip.
-
Power supply is firmly connected to Palette and the wall outlet.
-
Filament is untangled and spools are positioned to feed filament easily.
-
-
-
-
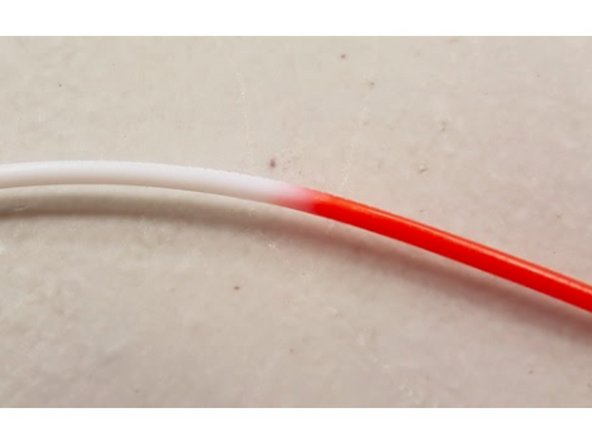
Palette splices together different materials and feeds them into 3D printers to create objects with multiple colors and materials.
-
Please also make sure the filament you are working with isn’t too brittle, as this can lead to breakages within Palette during your print. We recommend drying your filament before printing with Palette, and storing your filament properly to ensure it doesn't absorb moisture.
-
Palette uses a combination of heat, compression, and cooling to join these filaments together depending on the materials’ properties.
-
The default splice tuning settings are 0,0,0.
-
We recommend using filament that is within +/- 0.03 mm spec of 1.75 mm to create the best quality splices.
-
It's recommended to perform splice tuning before printing to test the materials that will be used with Palette. If the default settings cause issues such as broken splices or jams, please see the full splice tuning guide.
-
-
-
For the calibration print, we recommend using PLA.
-
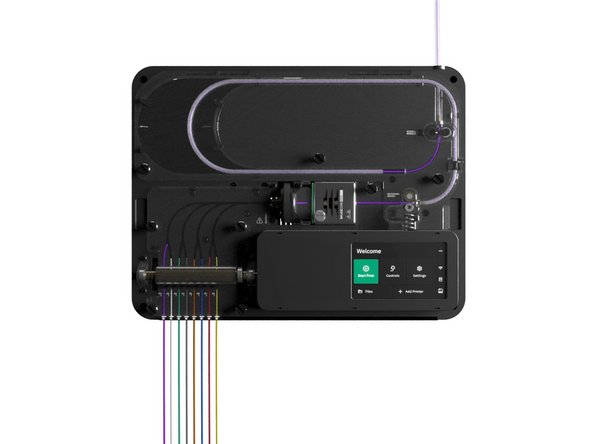
Accessory mode is available for most compatible printers. In this mode, there is no digital connection between Palette 3 (Pro) and the printer. After slicing, a file for Palette and a separate file for the printer will be available.
-
Connected mode is compatible for printers that can receive G-Code over a USB cable. In this mode, Palette 3 (Pro) and the printer are connected. One file is used and streamed between Palette and the printer.
-
Follow the instructions here for accessory mode printing.
-
Follow the instructions here for connected mode printing.
-
-
-
After completing the first print, the next set of multi-material prints completed with this same printer profile will be further tuned by selecting to save or ignore the print based on calibration data.
-
Example multi-material models for profile tuning can be items like coasters, small animals or figurines.
-
Click here to learn more about Palette's calibration system in depth.
-


If you have any questions, please don't hesitate to contact us at support@mosaicmfg.com.
If you have any questions, please don't hesitate to contact us at support@mosaicmfg.com.
Cancel: I did not complete this guide.
19 other people completed this guide.
