Introduction
The densifier creates small chips of plastic at the beginning and end of prints or during transition sequences between different filaments. These chips are deposited in the transition container.
Tools
Parts
No parts specified.
-
-
Periodically check the transition container, accessible on the right hand side of Element, to see if it is full.
-
Pull the transition container out of Element. The transition container is secured by a magnet. Empty the transition material in accordance with your local waste and recycling guidelines.
-
To reinstall the transition container, slide the container in until you feel a connection with the magnet and it locks in place.
-
-
-
The brushes on the left side of the densifier will need to be replaced periodically. The brush may need to be changed if damaged or obstructed with debris.
-
Work gloves are recommended for this process as the brush bristles are sharp.
-
To remove, push the brushes up from the bottom of the brush mount and then pull the brushes out from the top.
-
To install, push the brushes in from the top of the brush mount.
-
-
-
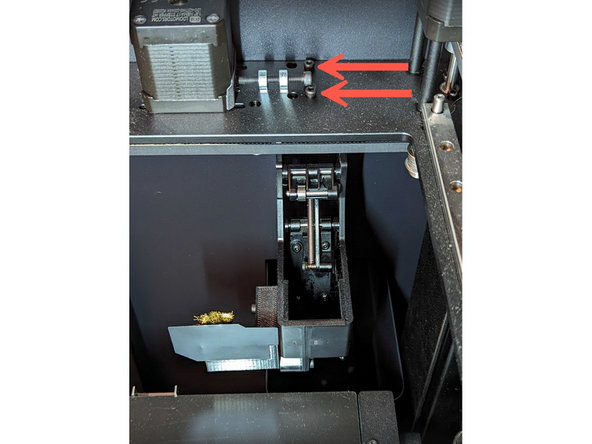
The densifier can be uninstalled from Element using a 2.5mm Hex/Allen key. It is held to the XY plate with 2 socket heads at the top of the densifier.
-
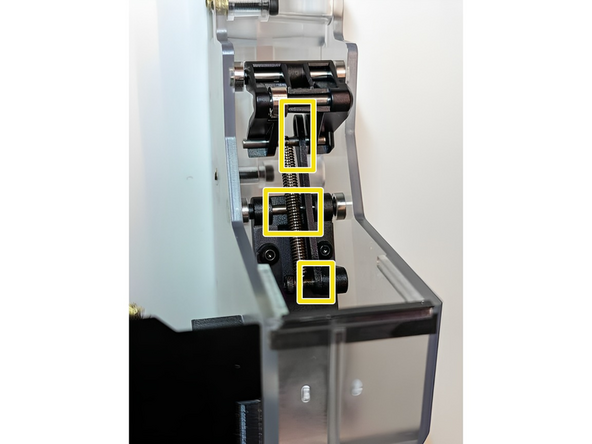
During periodic Element maintenance (or after a densifier failure), spray WD-40 or another similar lubricant on the indicated areas.
-
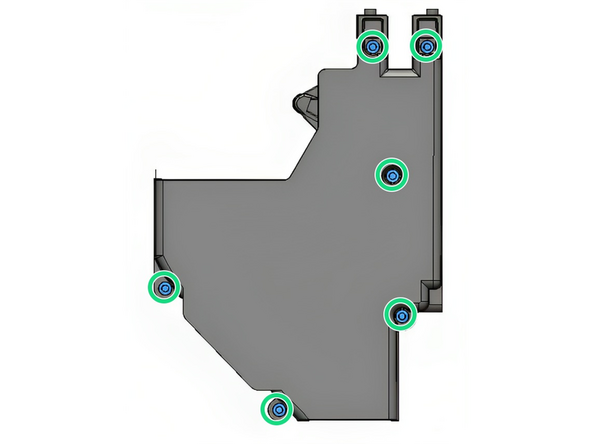
If chips get stuck inside the densifier itself, separating the clamshells (by removing the bolts shown) can help with accessing and removing the chips
-
When reinstalling the densifier, insert the 4 locating pins on the bottom of the densifier into the corresponding holes in the XY plate
-
If you have any questions, please don't hesitate to contact us at support@mosaicmfg.com.
If you have any questions, please don't hesitate to contact us at support@mosaicmfg.com.
Cancel: I did not complete this guide.
2 other people completed this guide.


