Introduction
Chroma provides you the option of creating files for your Palette 2 along with the Palette/Palette+ capabilities offered in the past. This would only be used if you would prefer to use one of our supported slicers (Simplify3D, Cura, KISSlicer, Slic3r/PrusaSlicer) instead of using CANVAS. Please note: as CANVAS is capable of slicing and creating print files for your Palette and printer, you would not need to use Chroma or another slicer in combination with CANVAS.
Tools
Parts
No parts specified.
-
-
When you first create a printer profile for Chroma, you will now have the option to choose between Palette/Palette 2 (S)(Pro).
-
In Chroma, select Profiles > Printer Profiles > New Profile.
-
Once you've selected your printer (or entered your printer's details), you'll need to select your Palette Type.
-
If Palette 2 (S)(Pro) is selected, you'll be able to select if a CANVAS Hub is connected (Connected Mode) or if you're using your Palette without a CANVAS Hub (Accessory Mode).
-
-
-
In Chroma, go to Tools > Preferences > Enable Advanced Settings > Save.
-
Select Profiles > Printer Profiles > Edit for your printer.
-
Select the Palette tab.
-
You'll be able to select the Palette Type. If Palette 2 (Pro) is selected, you'll be able to select if a CANVAS Hub is connected (Connected Mode) or if you're using your Palette without a CANVAS Hub (Accessory Mode).
-
Once this is set, Chroma will be ready to create files for your printer and Palette 2 (Pro).
-
-
-
The following slicers are compatible for printing with Palette. Before starting to print in multicolor, four toolheads/extruders would have to be added to the printer profile to account for the four filament input drives on Palette 2. (Simplify3D, Cura, Slic3r/PrusaSlicer, KISSlicer).
-
Load STL files into slicer. Assign toolheads/extruders to each STL to indicate it will be printed as a different color. Position and arrange STLs and modify print settings. In this example using Simplify3D, since we are only printing with two colors, we have two distinct toolheads.
-
Save G-Code file.
-
Launch Chroma and select the active printer profile with Palette 2. Load G-Code file saved from slicer.
-
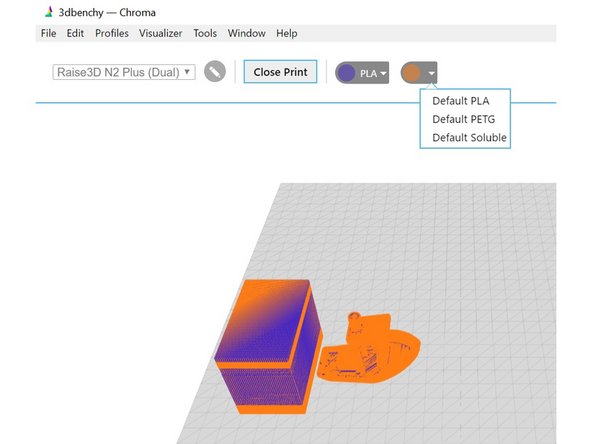
Assign colors and materials to drive inputs (the first color selector is for drive 1, second color selector is drive 2, etc.). Clicking the colored circle will allow color to be selected, and the dropdown arrow will allow material profiles to be selected for that drive.
-
Click the button 'Save for Printer.' Transfer the MAF file to the SD for the Palette 2, and the modified G-Code file can be transferred to the printer via USB, microSD/SD, or Wi-Fi.
-
Once these files are downloaded, you're ready to start the first print!
-
If you have any additional questions, please send us a message at support@mosaicmfg.com.
If you have any additional questions, please send us a message at support@mosaicmfg.com.
Cancel: I did not complete this guide.
3 other people completed this guide.


