
Introduction
In this guide you will learn how to change the surface finish of your prints using Slic3r's features, including ironing. We will also touch upon KISSlicer's surface finish option.
-
-
There is one surface finish option available using the KISSlicer engine - 'Avoid backtracking on solid layers'. You can find this in the General tab of your project settings.
-
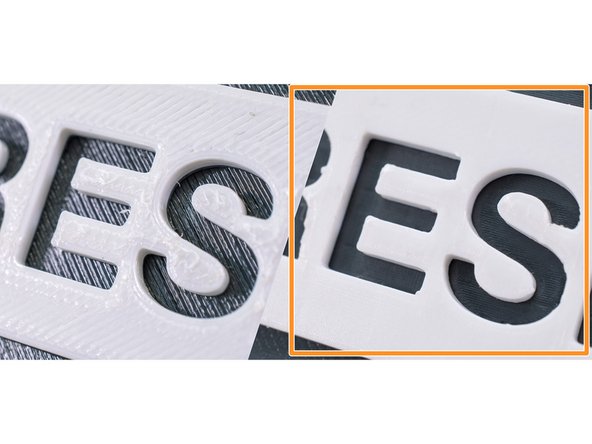
When enabled, all solid surfaces will be printed from one side of the object to the other. This will increase print time and retractions, but may lead to more uniform and visually appealing surfaces.
-
The effect will be particularly noticeable on parts with large, flat top layers.
-
-
-
Ironing and further surface finish settings are only accessible when using the Slic3r engine.
-
In your project, click Settings. Click the drop-down menu under Slicer and select Slic3r.
-
-
-
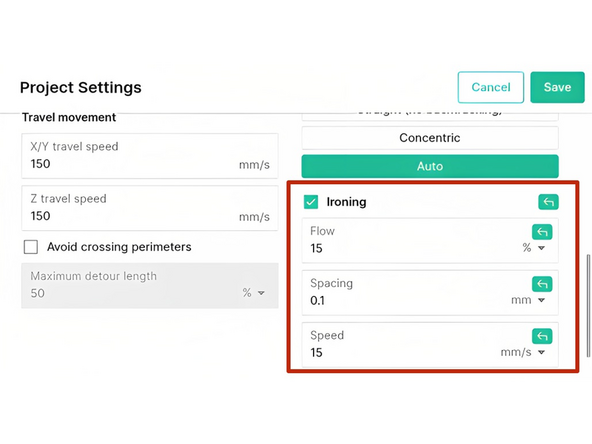
Ironing smooths out top layers by travelling along them and re-extruding a small amount of filament to fill the troughs between extrusions. The resulting print will have a smooth top surface finish.
-
Ironing is useful for prints with flat top surfaces such as logos, badges, boxes, lids, etc.
-
Flow: This controls the amount of filament extruded over each ironing pass. Use higher percentages when the troughs between extrusions are higher.
-
Spacing: The distance between ironing paths.
-
Speed: The speed at which the filament will extrude when ironing.
-
Click 'Save' once you have adjusted these settings.
-
-
-
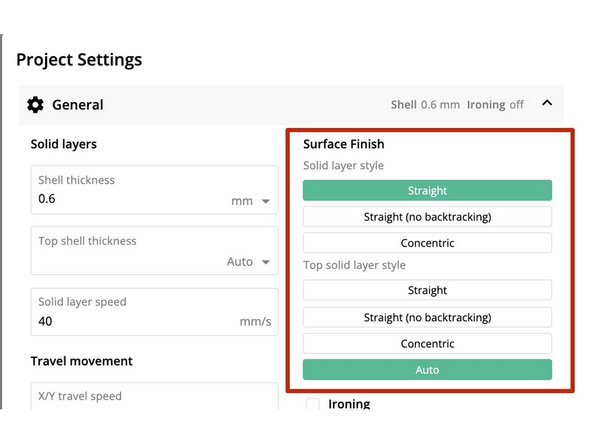
To create smooth top and bottom layers with a specific pattern, use the Surface Finishes option. Click Settings > General to access these settings.
-
Select the style you would like to use when generating solid top/bottom layers.
-
Straight: This will prompt your printer to fill the layer with a series of parallel lines.
-
Straight (no backtracking): This will create the same pattern as straight but without backtracking. This will prevent colours/materials from mixing.
-
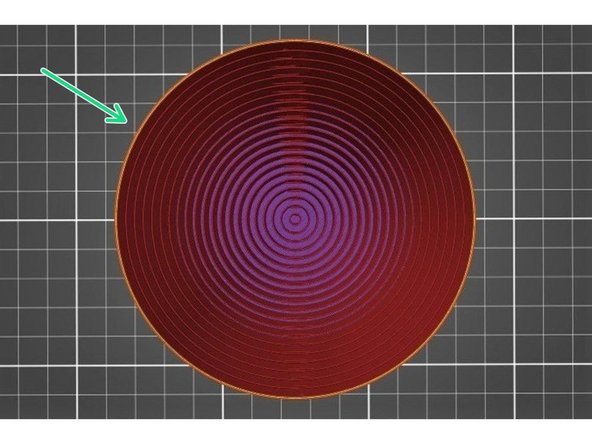
Concentric Fill: Fill the layer with a series of perimeters producing a ring-like effect.
-


If you have any additional questions, please send us a message at support@mosaicmfg.com.
If you have any additional questions, please send us a message at support@mosaicmfg.com.
Cancel: I did not complete this guide.
4 other people completed this guide.
