
Introduction
Note: It is important to use the correct print head for the correct materials. HT Print Heads are capable of extruding at a higher temperature and do not include cooling fans which are used when printing most low temperature materials.
You can follow on-screen steps on Element for all the below under Controls > Configurations.
-
-
Purge any remaining filament from the hot end, and unload filament using the controls on the screen by going to the Controls menu.
-
Cool the hot end
-
Center the print head in the XY plane, lower the bed to the bottom
-
Power down the printer and remove the power cable. It is important that the printer is turned off to avoid damage to the print head or printer’s electronics during the change
-
-
-
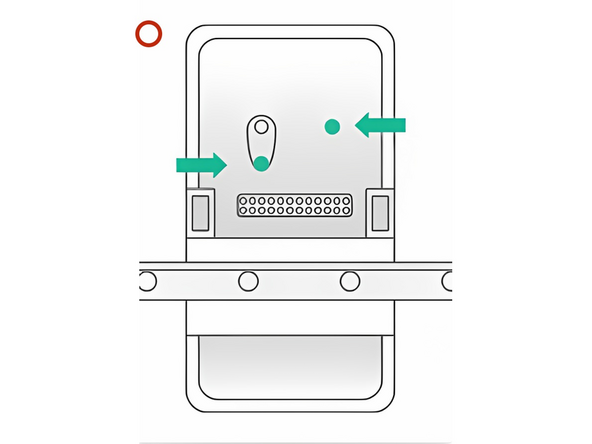
Remove the magnetic print head cover
-
Remove guide tube by rotating quarter-turn mechanism
-
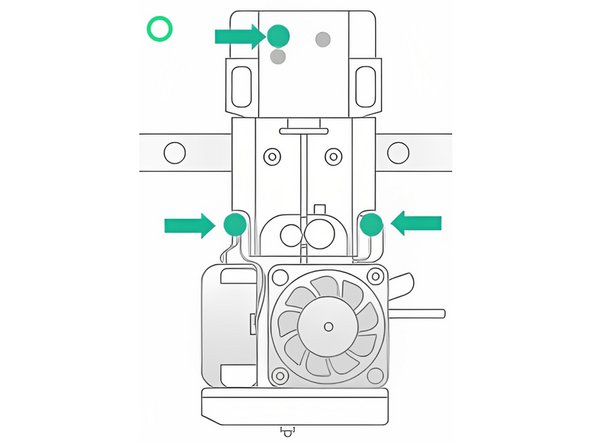
Use your thumb to hold the printhead against its base while undoing the thumbscrews. This helps maintain contact between the POGO pins on the back and is intended to reduce risk of disconnection issues
-
Remove the 3x green thumb screws
-
Remove the existing print head
-
-
-
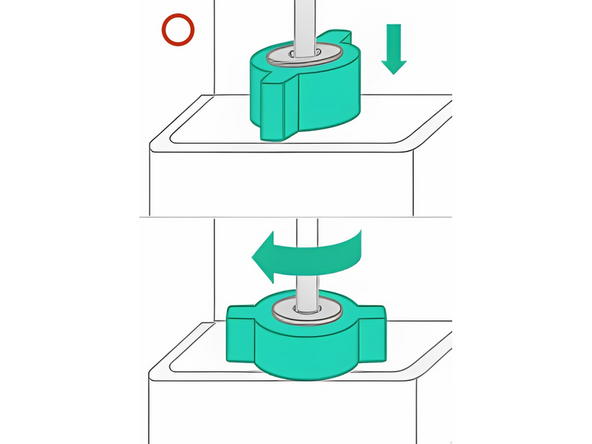
Place the new print head onto the mount, using the 2 metal pins for location until you feel the magnetic force pull the print head
-
Using one hand, apply force directly in the center of the print head; you can use the magnet as a common feature. You should feel the print head center itself into a position where it feels stable
-
Continue to press the print head against the fixed mount, and use your other hand to install and tighten all three thumbscrews
-
-
-
Install the guide tube by rotating the quarter-turn mechanism and replace the magnetic print head cover
-
Plug Element's power cable back in and turn on printer
-


If you have any questions, please don't hesitate to contact us at support@mosaicmfg.com.
If you have any questions, please don't hesitate to contact us at support@mosaicmfg.com.
Cancel: I did not complete this guide.
4 other people completed this guide.
