
Introduction
Canvas Hub S streamlines your 3D printing process by providing wireless connectivity between your printer, Palette 2, and printer. Your G-Code and settings are now accessible across your devices.
-
-
-
If you are using CANVAS Hub S, the image zip file is found here.
-
Please download and extract the zip folder.
-
Update 11.29.2021: The image files above have been updated for Python 3. When launching Octoprint for the first time, a new Octoprint user account will have to be created. Upon launching Octoprint for the first time you may also see a server error, please wait for about 5-7 minutes to allow it to start.
-
-
-
Disconnect the power cable from your CANVAS Hub and open it up by inserting a flat head screwdriver under the lip of the lid and prying the top lid off.
-
Gently lift the PCB out of the enclosure.
-
Flip over the board and remove the SD Card.
-
-
-
Insert the microSD card into your computer. An adapter may be necessary.
-
-
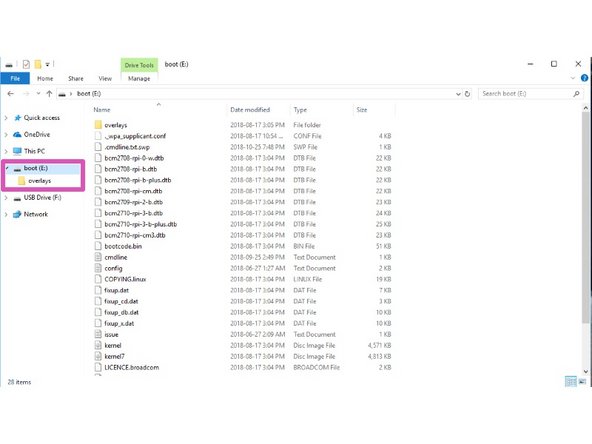
Verify which drive your microSD is present on (in this example, our SD card is on the E: drive).
-
-
-
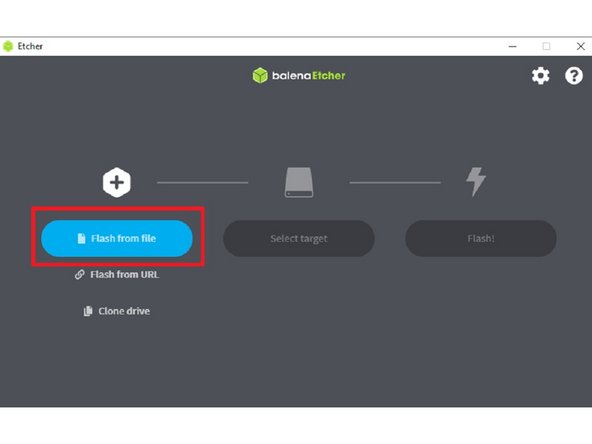
Open balenaEtcher, and click 'Flash from file'. Load the image zip file.
-
Once loaded, Etcher should automatically select the drive for your SD card.
-
Select 'Flash!'. The process should take a few minutes to write onto your SD card.
-
Reassemble your CANVAS Hub and follow the guide for setting up your CANVAS Hub. Please note that your new web address is 'ABCD-CH-canvas-hub.local/'.
-
-
-
Power on the Canvas Hub by plugging in its power supply.
-
Allow the hub to boot up for a few minutes, the status LED will blink quickly.
-
Once the hub is booted up, the status light will change to a slow blink. On your PC, open to view available WiFi networks.
-
The Canvas Hub S should appear with the name 'abcd-ch-canvas-hub.' Connect to this network
-
-
-
Once the PC is connected to the hub's hotspot, enter 10.0.0.5/ into the web browser to connect to Octoprint.
-
Proceed with the setup wizard, once complete go to Settings (wrench icon) > Network Connection.
-
Search for the WiFi network you would like to connect the hub to, and click Connect. From there, enter the password for the WiFi network.
-
Networks must be 2.4GHz
-
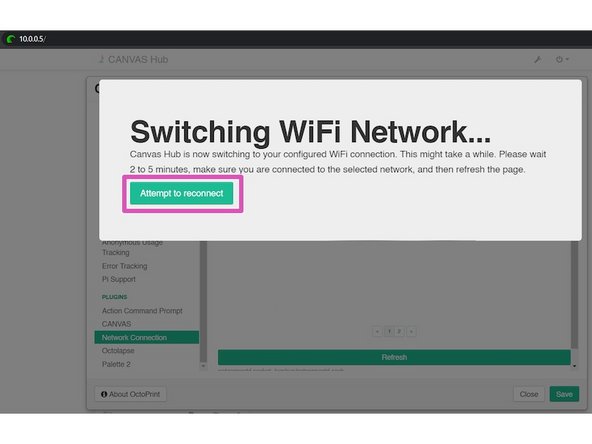
After the password is entered, allow a few minutes for the hub to switch from using its own hotspot, to connecting to the selected network.
-
If the connection is successful, the hub's hotspot will disappear from the list of available networks, and the hub's status LED will change to a solid white color.
-
Connect back to Octoprint by either entering 'abcd-ch-canvas-hub.local/' in the web browser, or use an IP scanner to identify the Canvas Hub and enter the IP address into the browser.
-
The IP Scan should display the hub's hostname as Shenzhen Ogemray Technology Co.,Ltd.
-
-
-
To allow uploading of your sliced files directly from Canvas, you will need to first connect your account to Canvas Hub. In Octoprint, go to the Canvas tab and click "Get activation code".
-
Visit canvas3d.io/connect to enter the activation code and link your Canvas account to Octoprint.
-
If the link is successful, you will see your username in the Linked Accounts section, and Connection Status will change to Connected. This will allow you to send prints directly from Canvas after slicing to Canvas Hub.
-
To remove a Canvas Hub from your account, login to Canvas and go to Devices.
-
-
-
There is a Connection window on the top-left of the web page for controlling the connection to your printer. If Canvas Hub is connected to your printer with a USB cable and powered on, proceed to press Connect.
-
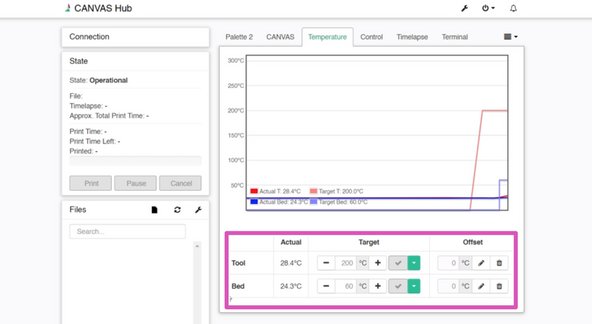
If the connection is successful, the status will change to Operational, and you will be able to control the printer from the Temperature and Control tabs.
-
If you are unable to connect using AUTO for the ports section, please select a manual port available to connect to your printer.
-
-
-
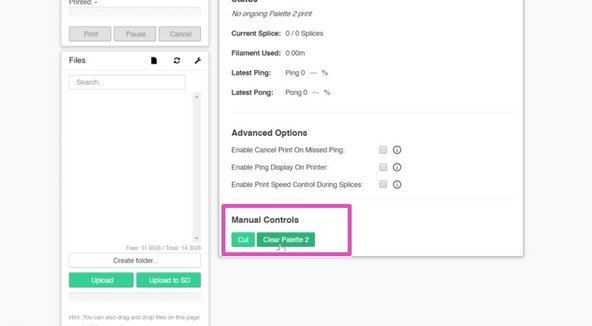
Navigate to the Palette 2 tab. If Canvas Hub is connected to Palette with a USB cable and is powered on, proceed to press Connect to Palette 2.
-
If the connection is successful, the status will change to Connected. You will be able to operate some Palette controls from here, and you can test the connection by pressing the Cut or Clear Palette 2 buttons to see Palette respond.
-
If you are unable to connect using AUTO for the ports section, please select a manual port available to connect to Palette.
-
-
-
Your Canvas Hub is now ready to go! Visit canvas3d.io to slice your first project to calibrate Palette with your printer. Please also continue with Palette 2 connected printing instructions.
-


If you have any additional questions, please send us a message at support@mosaicmfg.com.
If you have any additional questions, please send us a message at support@mosaicmfg.com.
Cancel: I did not complete this guide.
One other person completed this guide.
Attached Documents
