
Introduction
In this guide, you will learn how to:
- How to select a printer preset (available if Palette 3 is connected to the Internet)
- Measure the loading offset for your extruder, and how this is used in calibration
- How to start a print
Accessory Mode printing is where Palette's splicing and the printer's execution of the G-Code are separate. A mafx file is loaded on Palette to create splices, while the G-Code is sent to the printer using a compatible method or storage device (e.g. over WiFi, USB drive, microSD/SD card).
In Accessory Mode, connection to Canvas and the Internet is optional. If you would like to connect Palette 3 to the Internet and Canvas, please follow the steps here.
If you have not yet setup a printer profile in Canvas and sliced the calibration print, please first complete this Canvas Setup Guide
-
-
After slicing your first multi-color project, download the files for printing.
-
Transfer the .mafx file to Palette by copying the file to a USB drive, and send the .gcode file to the printer.
-
-
-
From Palette's menu screen, tap on Start Print.
-
Select the location for the .mafx file.
-
If the printer setup was skipped during the initial setup, but Palette 3 is connected to the Internet, a list of common printer makes and models will be available to select from. Otherwise, you can enter custom details for the printer.
-
-
-
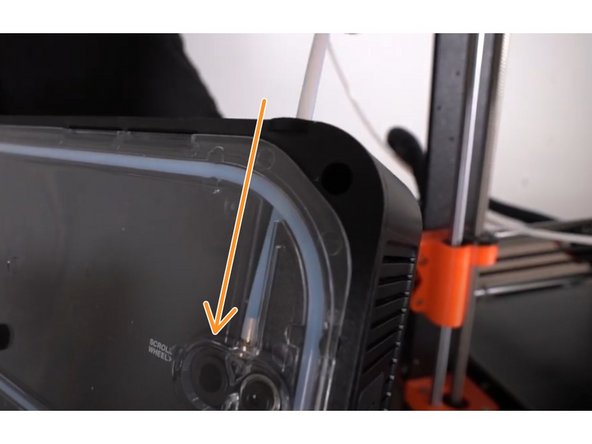
Check that the extruder clip is attached to the printer, using velcro provided.
-
Ensure that the correct outgoing tube length is selected on-screen, and inserted into Palette's output only. The outgoing tube should be unattached to the tube clip, so that filament can be loaded into the extruder first.
-
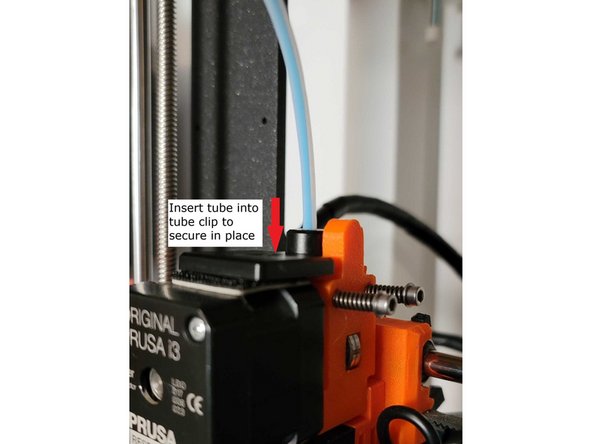
The purpose of the extruder clip is to connect Palette's outgoing tube directly to the printer's extruder. This tube clip and outgoing tube keeps the filament production and delivery to the printer as consistent as possible, to help maintain calibration. Note: This photo shows the tube/clip installation while a print is in progress
-
-
-
-
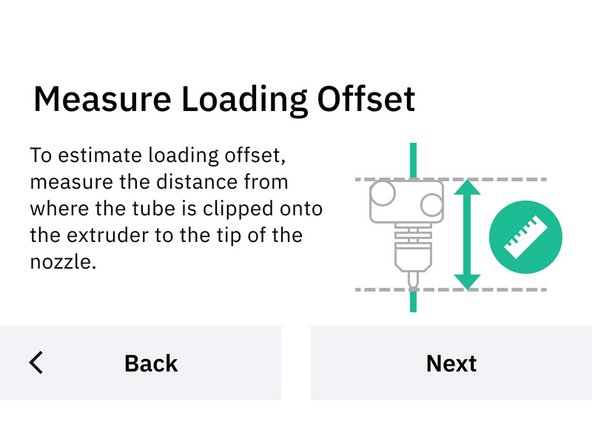
Enter the loading offset (LO). To do this, please enter the length between the tube clip on the extruder to the tip of the nozzle.
-
For bowden printers, please measure from the bottom of the extruder, the bowden tube length, and hot end to the nozzle point.
-
The LO entered can be -/+ 5mm of the actual distance from the tube clip/extruder to nozzle.
-
After saving the LO, your printer’s calibration data will be saved. If you are not using one of the preset printer profiles on Palette, feel free to rename the printer for easier identification.
-
If a preset printer was selected, the loading offset is already stored with the preset. If the printer has a modified extruder, the loading offset will require measurement.
-
For calibration purposes, the loading offset is used to determine how much filament to create in order to start the print. An accurate loading offset will produce enough filament to prime the nozzle.
-
This step is only necessary when starting a new calibration. Future prints with the same Canvas printer profile will use this LO.
-
-
-
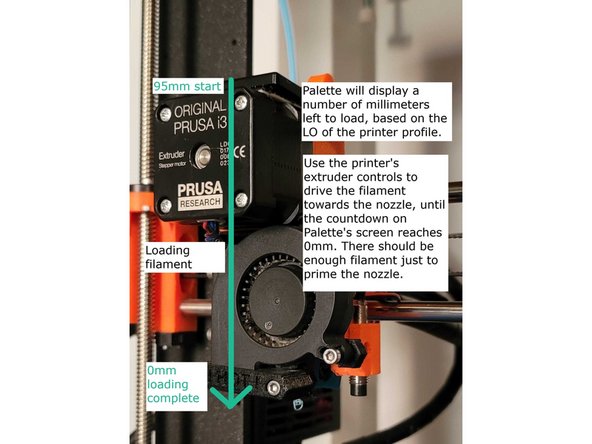
Palette will initialize, before prompting to load filament into the inputs.
-
Preheat printer while Palette produces splices.
-
Once Palette is done creating the initial splices, there should be about an inch of filament coming out of the outgoing tube. Insert this filament end into the extruder, while using the printer's screen/controls to drive filament forward.
-
During this step, you should be able to feel the filament gripped by the extruder as it's driven forward.
-
For bowden extruders, an additional 10-15cm of filament can be pulled from the tube and inserted manually through the bowden extruder to reach the nozzle quicker.
-
-
-
Once the filament is gripped by the extruder’s gears, continue jogging the filament to insert the tube end into the clip grommet.
-
As filament is being driven to the nozzle, it will cause the tube to move closer to the clip closing the gap. This will allow it to be inserted into the hole without putting excessive pressure on the filament.
-
-
-
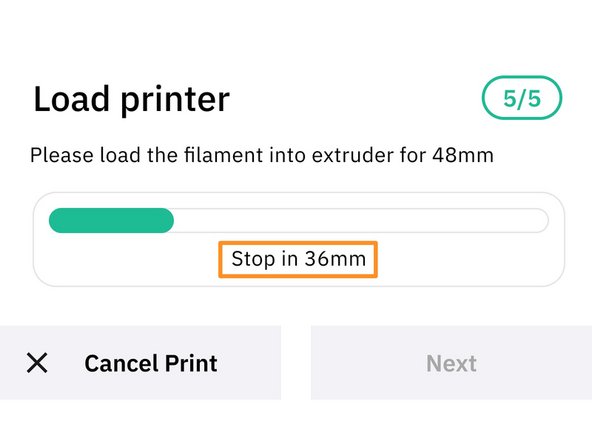
Jog the remaining filament prompted on Palette’s screen, by using the printer's screen/controls to drive the filament forward.
-
As filament continues loading towards the nozzle, the filament amount displayed on Palette will decrease. The amount of filament left to load displayed on Palette will depend on how much filament was jogged in the last two steps.
-
With an accurate loading offset saved, after loading is complete at 0mm, the nozzle should be primed. You should have a small amount of filament (~5mm-10mm) come out of the nozzle. Click here to learn more about loading offset and how to modify it on the Palette printer profile.
-
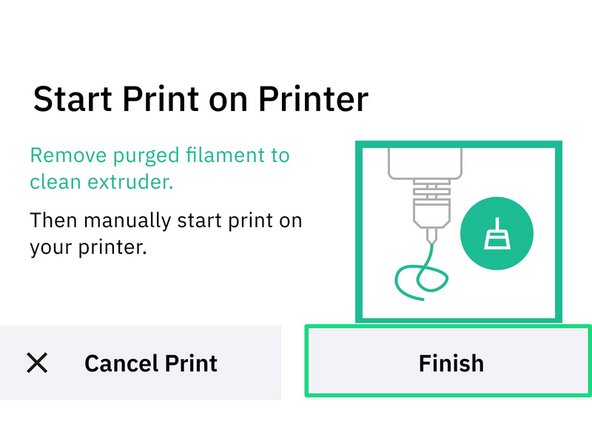
Clear the purged filament from the nozzle (any filament remaining from the previous print should have been extruded during this step). Start the G-Code or print file using the printer's menu.
-
-
-
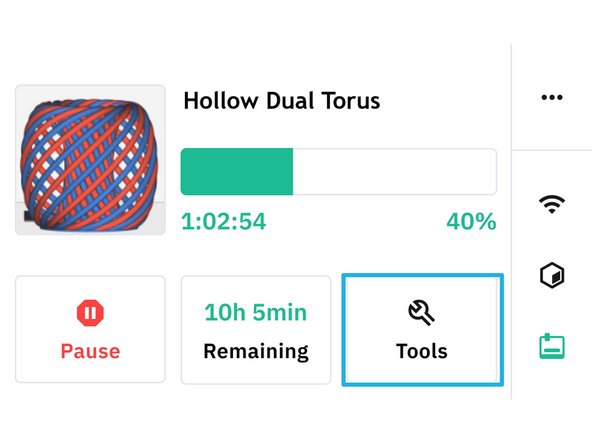
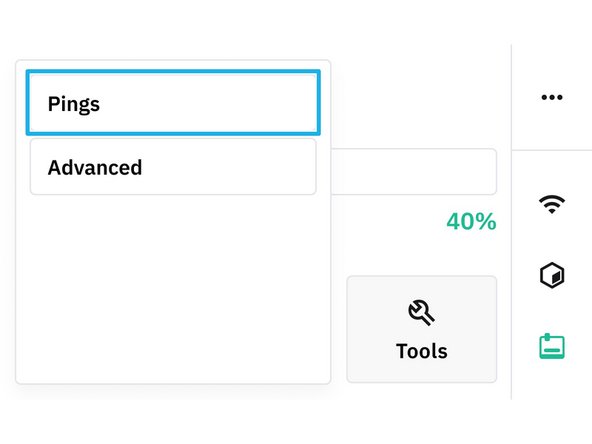
Monitoring calibration: To view calibration pings while a print is in progress, go to Tools > Pings from Palette's screen.
-
The goal is for pings to be consistent, and not fluctuate >3% from one ping to the next.
-
Click here to learn more about Palette's calibration system in depth.
-
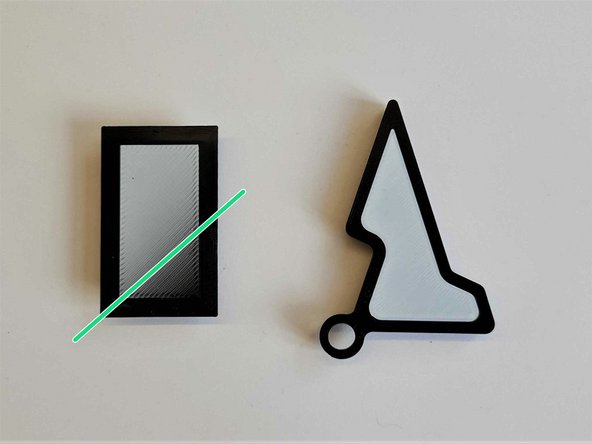
Reviewing print after completion: If the loading offset for the printer is accurate, the first transition on the tower will appear approximately 30-40% from the bottom-right. The keychain will have a clean border from the interior section.
-
Troubleshooting loading offset from first print: In the event you find that transitions are happening too early or too late, it's possible that the loading offset for the printer profile is inaccurate. To learn how to adjust this, please see this guide.
-
Next prints and tuning printer profile: The next set of multi-material prints completed with this same printer profile will be further tuned by selecting to save or ignore the print based on pings and calibration data.
-
If a print has colors more than 50% in the correct place and pings are mostly consistent, select 'Great' upon print completion to tune the printer profile.
-
Example multi-material models for profile tuning can be items like coasters, small animals or figurines.
-


If you have any questions, please don't hesitate to contact us at support@mosaicmfg.com.
If you have any questions, please don't hesitate to contact us at support@mosaicmfg.com.
Cancel: I did not complete this guide.
22 other people completed this guide.
