The following steps will replace the existing clear bowden tube that ships with your Ultimaker with a white PTFE bowden tube designed to work with 1.75mm filament.
1) Remove any filament from the printer's extruder, bowden tube, and print head.
2) Remove the clear Ultimaker bowden tube by disconnecting the lock clips found on each end of the tube and pressing down on the corresponding coupler.

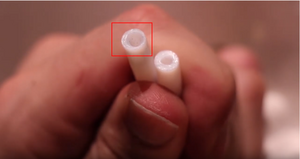
3) Identify the side of the tube that has an internal taper (circled in red). Press this side of the new white tube with the taper into the extruder output on the back of the printer tube was. Similarly press the non-tapered side into the print head.


4) Press the non-tapered side into the print head and secure it by adding in the lock clips that were previously removed.

Once the lock clips are installed, press the tube into the feeder and print head again to ensure that it is securely installed as deeply as it can go.
