
Introduction
This support article is to help if you see that filament has gotten jammed in the gears of Palette's ingoing drives. This can be caused by sharp filament being loaded into Palette which gets caught before entering the Teflon tubing.
Tools
Parts
No parts specified.
-
-
Remove the front plate of your Palette by carefully removing the 6 screws.
-
You'll notice that we did not remove the DC barrel nut from the front plate. You can place the front plate to the side, still attached to the tether.
-
Next, detach the screen by removing the 4 screws using the same 2.0 mm hex key.
-
-
-
Once the screws are removed the screen is still connected, so carefully place this piece to the side and you'll have a clear path to the merger. Carefully shift the drives to the side so that you can access the two screws which attach the merger to the cutter.
-
Once you free the acrylic piece, you'll need to detach the motors from Palette. Remove the bottom lid of your Palette. This will uncover where the motors are attached to Palette. You will need to cut the three zip-ties which are holding the wires together.
-
Before proceeding, please be sure to note the position of each plug, as each motor aligns differently. The pictures below highlight where the red wire should line up. Only detach the blocked motor as well as the corresponding motor which is attached via the acrylic plate.
-
-
-
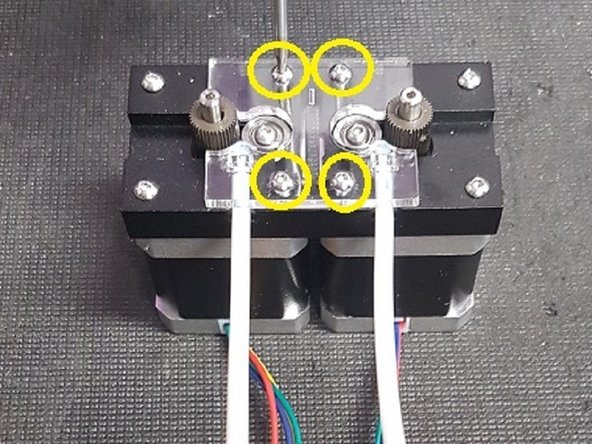
Once you've disconnected the motors, remove the 4 screws on the acrylic plate which holds the two motors.
-
You'll be able to remove the acrylic plate, giving you access to the jam. Carefully clear the blockage, and check to see if the Teflon tubing has been deformed by the filament. If it has, use a tool (such as a screwdriver) to repair the opening.
-
Once everything has been cleared, replace the acrylic plate and tubing to the motors. Hand-tighten the screws but be carefully not to overtighten as this will crack the acrylic. Please note the orientation of the acrylic pieces, as the acrylic plate should be flush with the motors after assembly.
-
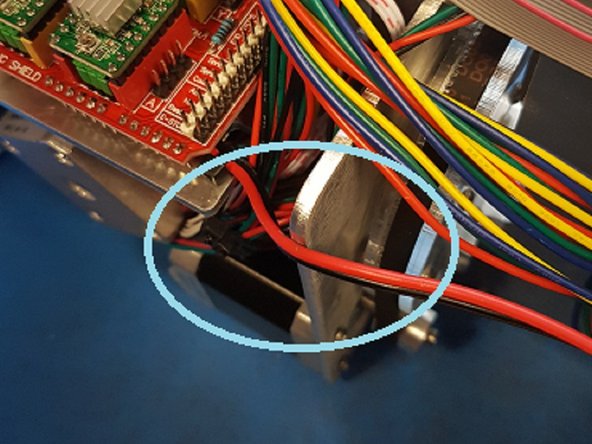
Reassemble Palette. When you replace the bottom lid of your Palette, please be sure to place the wires along the side of your Palette so that no pinches are created with the metal plate. Be especially mindful to not have the power supply cable pinched at the bottom. Please avoid this positioning.
-
To reassemble the acrylic pieces of the merger, refer to this support article.
-


If you have any additional questions, please send us a message at support@mosaicmfg.com
If you have any additional questions, please send us a message at support@mosaicmfg.com
