
Introduction
NB: Only official Mosaic hot ends should be used. 3rd-party nozzles should not be used with Element and Array.
Contact your Account Manager or support@mosaicmfg.com with any questions, or for help ordering replacement hot ends.
Parts
No parts specified.
-
-
Ensure the print head is cold and that all filament is removed from the nozzle. Power down the printer and remove the power cable
-
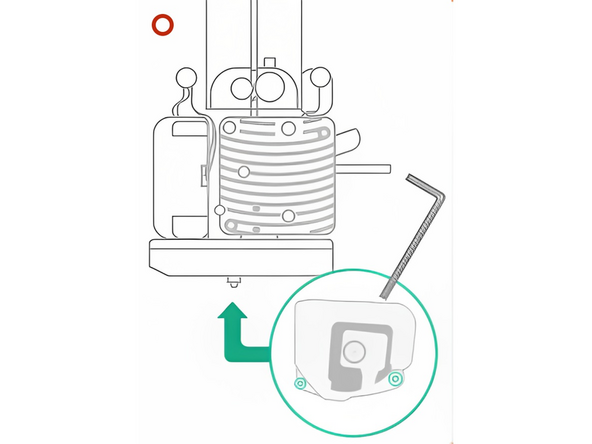
Remove the magnetic printhead cover
-
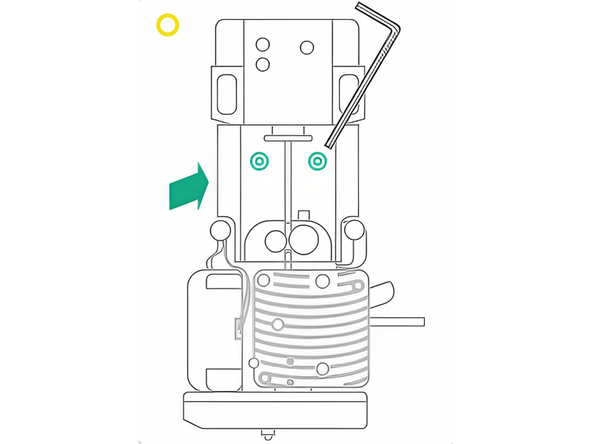
Using a 2.5mm Hex Key, remove the heatsink fan by unscrewing the 2 socket-head bolts
-
Remove the clear filament window by unscrewing 2 socket-head bolts
-
-
-
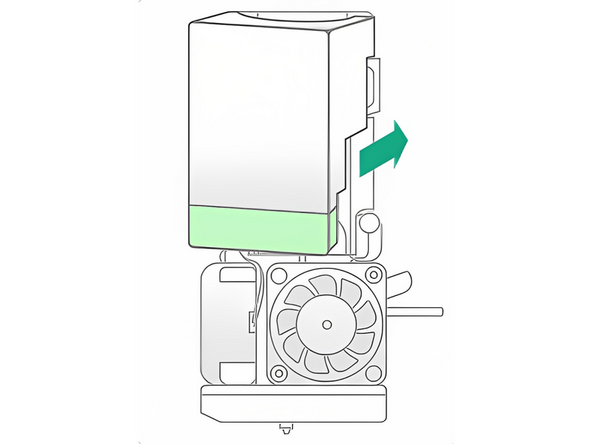
Remove the fan shroud and part cooling fan by unscrewing 2 socket-head bolts
-
Remove the heater cartridge and hot thermistor connector from the PCB
-
Using a 1.5mm hex, remove the 2 set screws from the heat sink that hold in the hot end (be careful with these small screws)
-
-
-
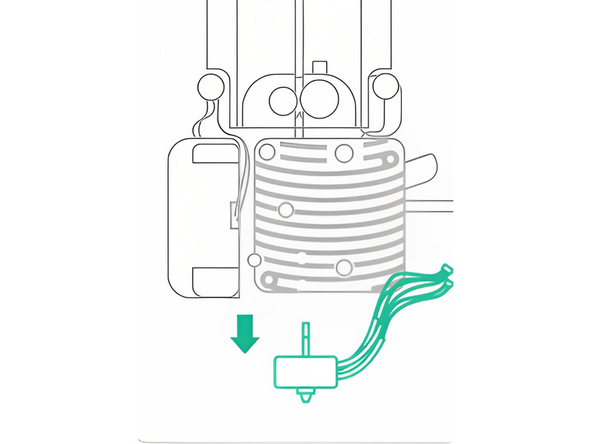
Remove the hot end assembly
-
-
-
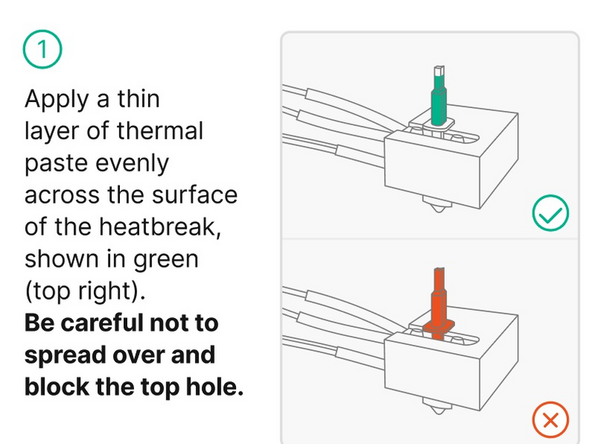
Apply thermal paste evenly to the heat break of the new Hot End. Take care not to spread paste over the top hole
-
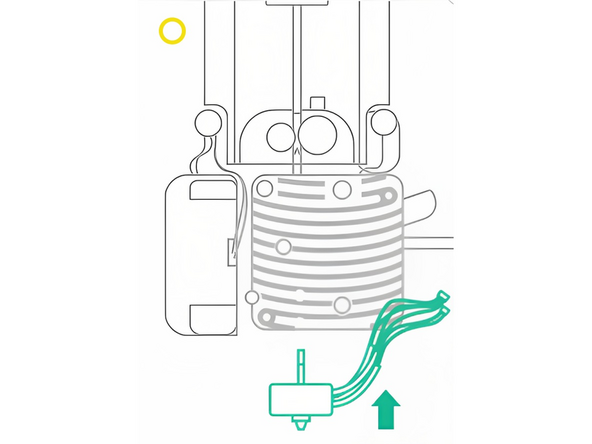
Insert the Hot End into the heatsink. Ensure proper vertical alignment so as to not get any leftover thermal paste inside the heat break.
-
Tighten the two set screws in the heatsink to lock the Hot End in place.
-
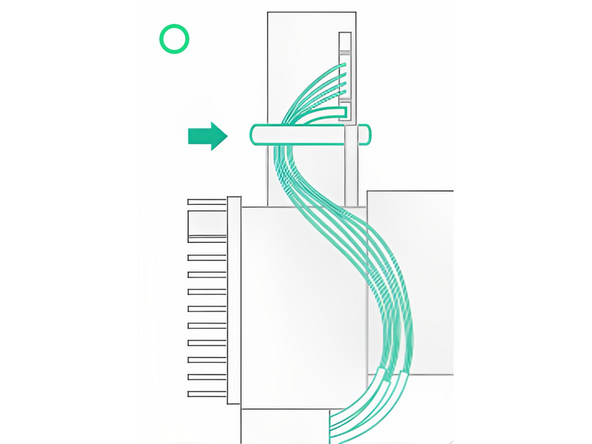
Re-install the wiring for the thermistor and heat cartridge. Guide wires through cable channel, which will allow clear filament window to be installed correctly
-
-
-
Install the fan shroud and cooling fan back in place by tightening 2 socket-head bolts
-
Place the clear filament window back, tightening 2 socket-head bolts
-
Re-install the heatsink fan by tightening the 2 socket-head bolts. Ensure that the hot-end is fully seated
-
-
-
Place the magnetic printhead cover back in place
-


If you have any questions, please don't hesitate to contact us at support@mosaicmfg.com.
If you have any questions, please don't hesitate to contact us at support@mosaicmfg.com.
Cancel: I did not complete this guide.
2 other people completed this guide.
