
Introduction
When you first load filament into your Palette, your Palette will home the cutter, the splicer, and the outgoing drive. During this time, the ingoing filament will retract slightly, then beep, and tell you that the homing is complete.
Filament not homing properly may be caused by an issue where the piece of filament is stuck inside of the opto sensor. This can happen when the filament is not long enough to hit the outgoing drive module, which normally clears this area.
There are two options to fix this issue for your Palette+.
Tools
Parts
No parts specified.
-
-
Plug the power supply in and turn on Palette.
-
Insert a filament into Drive 1.
-
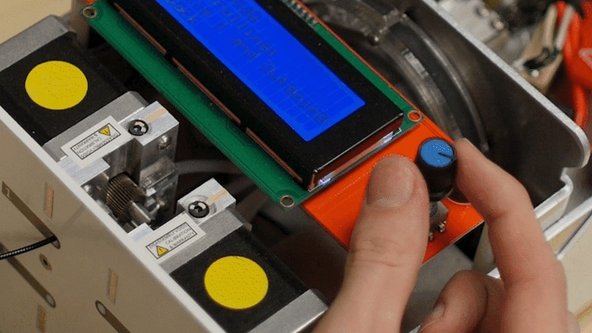
Access the menu and select Manual control > Jog mode > Drive 1 with outgoing drive.
-
Manually spin the dial so that it pushes the filament all the way through your Palette, which will push the smaller piece out the exit tube.
-
Once complete, reverse the spin of the dial and "jog" the filament back out of Drive 1.
-
Repeat with other drives if necessary.
-
-
-
WARNING: Palette's hot tool, splicing region, and other parts may still be hot.
-
Unplug Palette and use the 2.0 mm hex key provided in the Palette Tool Kit to remove the 4 screws on Palette's top cover.
-
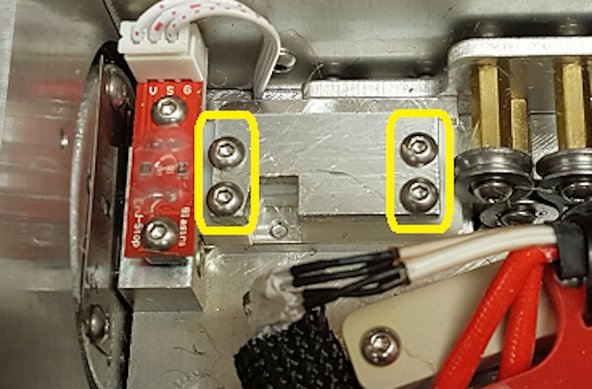
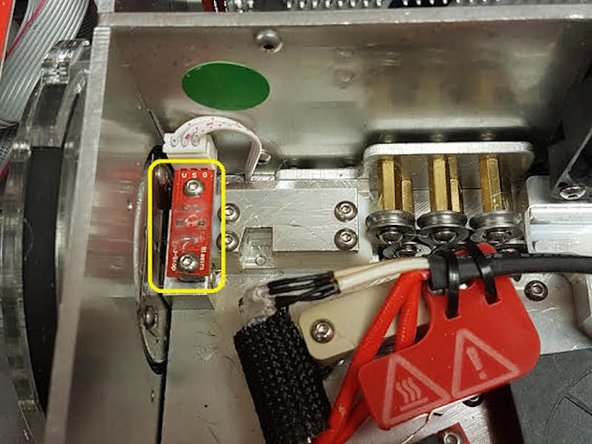
Remove the 2 screws on top of the Opto Sensor.
-
Lift up and remove the Opto.
-
Visually inspect the Opto sensor and surrounding area for any filament that might be blocking the Opto.
-
Using compressed air can help clear this area of smaller bits of filament.
-
Carefully remove any filament using your fingers or pliers. Careful not to touch the hot tool or other hot areas.
-
Once you've removed the obstruction, reassemble.
-
-
-
WARNING: Palette's hot tool, splicing region, and other parts may still be hot.
-
Unplug Palette and use the 2.0 mm hex key provided in the Palette Tool Kit to remove the 4 screws on Palette's top cover.
-
Remove the 4 screws on top of the metal plate at the splicing region.
-
Remove the metal plate.
-
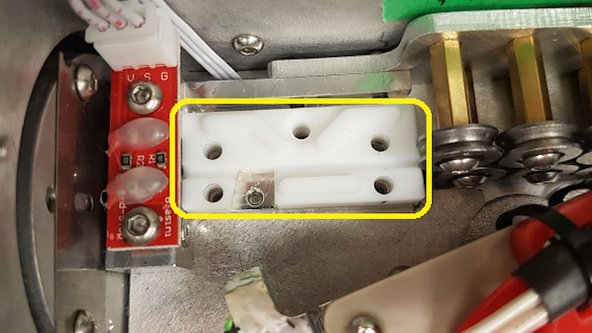
Remove the top white Teflon piece.
-
Visually inspect the white Teflon block for any filament that might be blocking the Opto.
-
Carefully remove any filament using your fingers or pliers. Careful not to touch the hot tool or other hot areas.
-
Once you've removed the obstruction, reassemble: Replace the top white Teflon piece, the metal plate, and the 4 screws. Replace the top cover and its 4 screws.
-
-
-
Plug the power supply in and turn on Palette.
-
Insert a filament into Drive 1.
-
Access the menu and select Manual control > Jog mode > Drive 1 with outgoing drive.
-
Manually spin the dial so that it pushes the filament all the way through your Palette, which will push the smaller piece out the exit tube.
-
Once complete, reverse the spin of the dial and "jog" the filament back out of Drive 1.
-
Repeat with other drives if necessary.
-
-
-
Unplug Palette and use the 2.0 mm hex key provided in the Palette Tool Kit to remove the 4 screws on Palette's top cover.
-
Remove the 2 screws on top of the Opto Sensor.
-
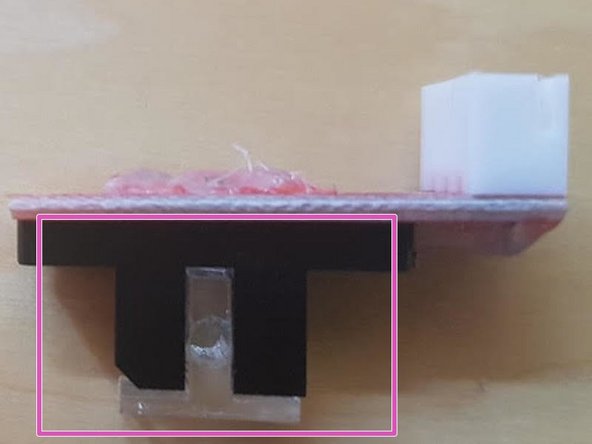
Lift up and remove the Opto. You may need a tool to do this, as you would want to lift the Opto as evenly as possible to avoid damaging the Opto and Opto T
-
Visually inspect the Opto T and surrounding area for any filament that might be blocking the Opto. Please note the position of the T as there is a wider opening which should be facing the motors when replaced.
-
Carefully remove any filament using your fingers or pliers. Careful not to touch the hot tool or other hot areas.
-
Once you've removed the obstruction, reassemble.
-


If you have any questions, please contact us at support@mosaicmfg.com.
If you have any questions, please contact us at support@mosaicmfg.com.
